Extending Page Builder Framework

In this post we are going to extend Page Builder Framework with custom elements and add our own settings to the WordPress customizer.
In this tutorial, we are going to show you how we quickly, and easily, add custom elements to our website and how we manage those with our own settings right inside the WordPress customizer.
For the sake of this tutorial, we are going to add 2 lead generation elements to our website:
- A Promotion/Notification Bar
- A Call to Action Button that sticks to the right side of our website
We’re going to walk you through all the necessary steps to add your own elements & Customizer settings to your website using Page Builder Framework.
If you want to skip the development process, simply download our sample plugin at the end of this post.
Otherwise, let’s get started! 🙂
Table of Content
- Create a Plugin
- Add Default Styling
- Add Customizer Settings
- Add Promo Bar & CTA Button to the website
- Apply Custom Styles using PBF’s CSS engine
- Download Sample Plugin
Create a Plugin
Let’s create a folder right inside the plugins folder of your local (or remote) test installation called pbf-sample. Inside of it we add a new file called pbf-sample.php.
To initialize our plugin, the content of the file will look like this:
<?php
/**
 * Plugin Name: PBF Sample
 * Plugin URI: https://wp-pagebuilderframework.com/
 * Description: Example Plugin to extend Page Builder Framework.
 * Version: 1.0
 * Author: MapSteps
 * Author URI: https://wp-pagebuilderframework.com/
 * Text Domain: pbf-sample
 *
 * @package PBF_Sample
 */

defined( 'ABSPATH' ) || die( "Can't access directly" );

// Textdomain.
function pbf_sample_textdomain() {
	load_plugin_textdomain( 'pbf-sample', false, plugin_basename( dirname( __FILE__ ) ) . '/languages' );
}
add_action( 'plugins_loaded', 'pbf_sample_textdomain' );
In the actual sample plugin below things are a bit more organized but to keep it simple, we will add all following code snippets to that file.
After the file has been saved we will now see the plugin on your test installation. Let’s activate it so we can monitor our changes.

Default Styling
Now that we have created our plugin, let’s start to add some code to it. First, we’re going to add the default styling for our Promo Bar & Book Now Button. Let’s add a css folder to our root directory (sample-plugin folder). Inside of that, we create a new file called default-styles.css with the following content:
/* Book Now Button */
.pbf-sample-book-now-button {
	position: fixed;
	right: 0px;
	top: 50%;
	background: #78ead3;
	font-weight: 700;
	border-bottom-left-radius: 5px;
	border-bottom-right-radius: 5px;
	-moz-transform: rotate(90deg);
	-ms-transform: rotate(90deg);
	-o-transform: rotate(90deg);
	-webkit-transform: rotate(90deg);
	transform: rotate(90deg);
	-moz-transition: all 0.3s;
	-o-transition: all 0.3s;
	-webkit-transition: all 0.3s;
	transition: all 0.3s;
	transform-origin: right top;
	-webkit-transform-origin: right top;
	-ms-transform-origin: right top;
}

.pbf-sample-book-now-button:hover {
	opacity: .9;
	padding-top: 3px;
	padding-bottom: 3px;
}

.pbf-sample-book-now-button a {
	color: #fff;
	padding: 10px 30px;
	display: block;
	font-size: 16px;
}

@media (max-width:1024px)  {
	.pbf-sample-book-now-button {
		display: none;
	}
}

/* Promo Bar */
.pbf-sample-promo-bar {
	background: #78ead3;
	text-align: center;
	padding: 10px 20px;
}

.pbf-sample-promo-bar-button {
	background: #fff;
	color: #78ead3;
	margin: 0 10px;
	padding: 10px 20px;
	display: inline-block;
	-moz-transition: all 0.3s;
	-o-transition: all 0.3s;
	-webkit-transition: all 0.3s;
	transition: all 0.3s;
}

.pbf-sample-promo-bar-button:hover {
	opacity: .9;
	color: #78ead3;
}

.pbf-sample-promo-bar-content {
	margin: 0;
}

.pbf-sample-promo-bar-text {
	color: #fff;
	font-weight: 700;
}
To actually load the file on our website we will enqueue it from our main plugin file like this:
/**
 * Enqueue scripts & styles.
 */
function pbf_sample_scripts_styles() {

	// Default styles.
	wp_enqueue_style( 'pbf-sample', plugin_dir_url( __FILE__ ) . 'css/default-styles.css', '', '1.0' );

}
add_action( 'wp_enqueue_scripts', 'pbf_sample_scripts_styles' );
Customizer Settings
Now, let’s register our Customizer settings. Page Builder Framework uses Kirki to add settings to the WordPress customizer.
Kirki works as a wrapper for the WordPress Customizer API which makes things a lot easier. It comes with predefined controls and also allows us to use conditional logic to hide/show specific settings that we are going to do in this tutorial as well.
/**
 * Add customizer settings.
 */
function pbf_sample_customizer_settings() {

	wpbf_customizer_panel()
		->id( 'pbf_sample_panel' )
		->title( __( 'PBF Sample Panel', 'page-builder-framework' ) )
		->priority( 1 )
		->add();

	wpbf_customizer_section()
		->id( 'book_now_section' )
		->title( __( 'Book Now Button', 'pbf-sample' ) )
		->priority( 10 )
		->addToPanel( 'pbf_sample_panel' );

	wpbf_customizer_section()
		->id( 'promo_bar_section' )
		->title( __( 'Promotion Bar', 'pbf-sample' ) )
		->priority( 11 )
		->addToPanel( 'pbf_sample_panel' );

	// Book now toggle.
	wpbf_customizer_field()
		->id( 'book_now_toggle' )
		->type( 'toggle' )
		->label( __( 'Activate', 'pbf-sample' ) )
		->defaultValue( false )
		->priority( 1 )
		->addToSection( 'book_now_section' );

	// Book now background color.
	wpbf_customizer_field()
		->id( 'book_now_background_color' )
		->type( 'color' )
		->label( __( 'Background Color', 'pbf-sample' ) )
		->defaultValue( '#78ead3' )
		->priority( 2 )
		->properties( [
			'mode' => 'alpha',
		] )
		->activeCallback( [
			array(
				'id'       => 'book_now_toggle',
				'operator' => '==',
				'value'    => true,
			),
		] )
		->addToSection( 'book_now_section' );

	// Book now font color.
	wpbf_customizer_field()
		->id( 'book_now_font_color' )
		->type( 'color' )
		->label( __( 'Font Color', 'pbf-sample' ) )
		->defaultValue( '#ffffff' )
		->priority( 3 )
		->properties( [
			'mode' => 'alpha',
		] )
		->activeCallback( [
			array(
				'id'       => 'book_now_toggle',
				'operator' => '==',
				'value'    => true,
			),
		] )
		->addToSection( 'book_now_section' );

	// Book now button URL.
	wpbf_customizer_field()
		->id( 'book_now_url' )
		->type( 'url' )
		->label( __( 'Link', 'pbf-sample' ) )
		->priority( 4 )
		->activeCallback( [
			array(
				'id'       => 'book_now_toggle',
				'operator' => '==',
				'value'    => true,
			),
		] )
		->addToSection( 'book_now_section' );

	// Promo bar toggle.
	wpbf_customizer_field()
		->id( 'promo_bar_toggle' )
		->type( 'toggle' )
		->label( __( 'Activate', 'pbf-sample' ) )
		->defaultValue( false )
		->priority( 1 )
		->addToSection( 'promo_bar_section' );

	// Promo bar background color.
	wpbf_customizer_field()
		->id( 'promo_bar_background_color' )
		->type( 'color' )
		->label( __( 'Background Color', 'pbf-sample' ) )
		->defaultValue( '#78ead3' )
		->priority( 2 )
		->properties( [
			'mode' => 'alpha',
		] )
		->activeCallback( [
			array(
				'id'       => 'promo_bar_toggle',
				'operator' => '==',
				'value'    => true,
			),
		] )
		->addToSection( 'promo_bar_section' );

	// Promo bar font color.
	wpbf_customizer_field()
		->id( 'promo_bar_font_color' )
		->type( 'color' )
		->label( __( 'Font Color', 'pbf-sample' ) )
		->defaultValue( '#ffffff' )
		->priority( 3 )
		->properties( [
			'mode' => 'alpha',
		] )
		->activeCallback( [
			array(
				'id'       => 'promo_bar_toggle',
				'operator' => '==',
				'value'    => true,
			),
		] )
		->addToSection( 'promo_bar_section' );

	// Promo bar text.
	wpbf_customizer_field()
		->id( 'promo_bar_text' )
		->type( 'text' )
		->label( __( 'Text', 'pbf-sample' ) )
		->priority( 4 )
		->activeCallback( [
			array(
				'id'       => 'promo_bar_toggle',
				'operator' => '==',
				'value'    => true,
			),
		] )
		->addToSection( 'promo_bar_section' );

	// Promo bar button text.
	wpbf_customizer_field()
		->id( 'promo_bar_button_text' )
		->type( 'text' )
		->label( __( 'Button Text', 'pbf-sample' ) )
		->priority( 5 )
		->activeCallback( [
			array(
				'id'       => 'promo_bar_toggle',
				'operator' => '==',
				'value'    => true,
			),
		] )
		->addToSection( 'promo_bar_section' );

	// Promo bar button URL.
	wpbf_customizer_field()
		->id( 'promo_bar_url' )
		->type( 'url' )
		->label( __( 'Link', 'pbf-sample' ) )
		->priority( 6 )
		->activeCallback( [
			array(
				'id'       => 'promo_bar_toggle',
				'operator' => '==',
				'value'    => true,
			),
		] )
		->addToSection( 'promo_bar_section' );

}
add_action( 'after_setup_theme', 'pbf_sample_customizer_settings' );
Don’t worry, this looks like more than it actually is! 🙂 Now that we have registered our settings, our Customizer panel should look something like this:
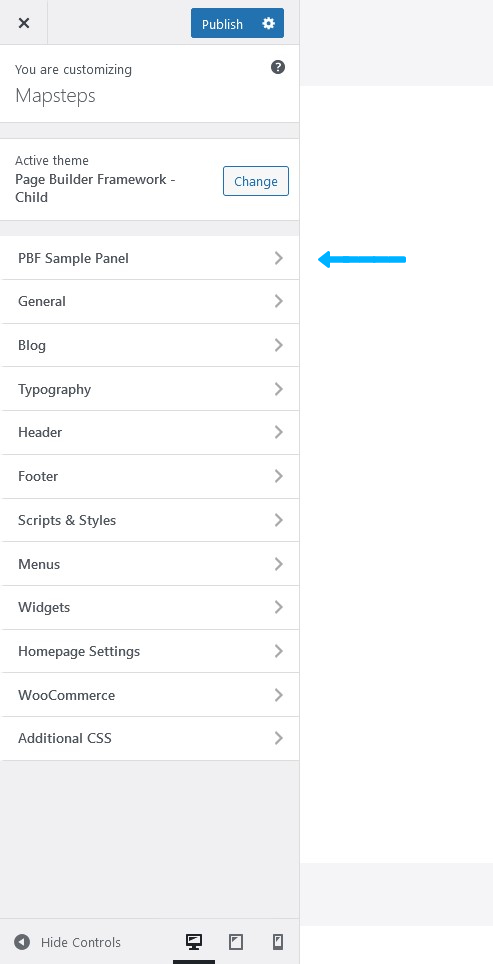
When clicking on “PBF Sample Panel” panel, it will show the sections we created.
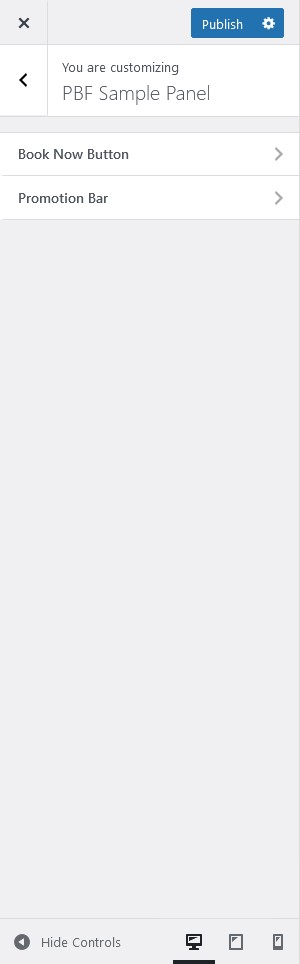
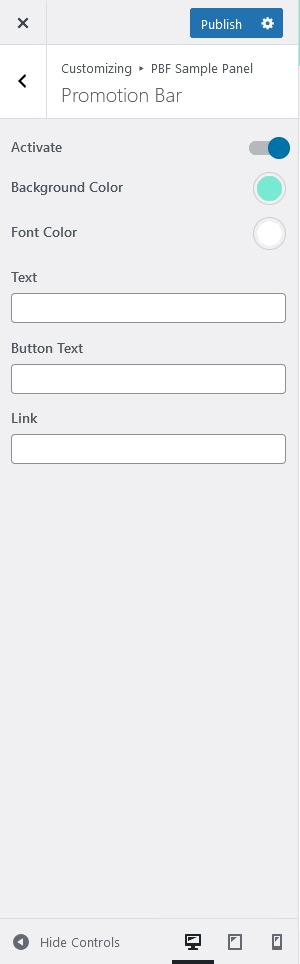
When clicking on one of our new sections, we are presented with a toggle that we can use to enable the features respectively. Of course, nothing will show up on the frontend just yet so let’s work on that next.
Add Elements to the Website
With the Promotion Bar & Call to Action Button activated in the Customizer it is time to actually display those on our website. To do that, simply add the code below to your pbf-sample.php file:
/**
 * Book Now Button output.
 */
function pbf_sample_book_now_button() {

	if ( get_theme_mod( 'book_now_toggle' ) ) {

		$url = get_theme_mod( 'book_now_url' ) ? get_theme_mod( 'book_now_url' ) : '#';

		$button  = '<div class="pbf-sample-book-now-button">';
		$button .= '<a href="' . esc_url( $url ) . '">Contact us today!</a>';
		$button .= '</div>';

		echo $button;

	}

}
add_action( 'wp_footer', 'pbf_sample_book_now_button' );

/**
 * Promo Bar output.
 */
function pbf_sample_promo_bar() {

	if ( get_theme_mod( 'promo_bar_toggle' ) ) {

		$url         = get_theme_mod( 'promo_bar_url' ) ? get_theme_mod( 'promo_bar_url' ) : '#';
		$text        = get_theme_mod( 'promo_bar_text' ) ? get_theme_mod( 'promo_bar_text' ) : 'Lorem ipsum dolor sit amet, consectetur adipisicing elit. Nam, quis!';
		$button_text = get_theme_mod( 'promo_bar_button_text' ) ? get_theme_mod( 'promo_bar_button_text' ) : 'Click Here';

		$promo_bar  = '<div class="pbf-sample-promo-bar">';
		$promo_bar .= '<p class="pbf-sample-promo-bar-content">';
		$promo_bar .= '<span class="pbf-sample-promo-bar-text">' . esc_html( $text ) . '</span>';
		$promo_bar .= '<a class="pbf-sample-promo-bar-button" href="' . esc_url( $url ) . '">' . esc_html( $button_text ) . '</a>';
		$promo_bar .= '</p>';
		$promo_bar .= '</div>';

		echo $promo_bar;

	}

}
add_action( 'wpbf_before_header', 'pbf_sample_promo_bar' );
Easy, eh? 🙂
Since we want to display the Promo Bar right before the Header we utilize Page Builder Framework’s wpbf_before_header hook (You can find a list of all available hooks here).
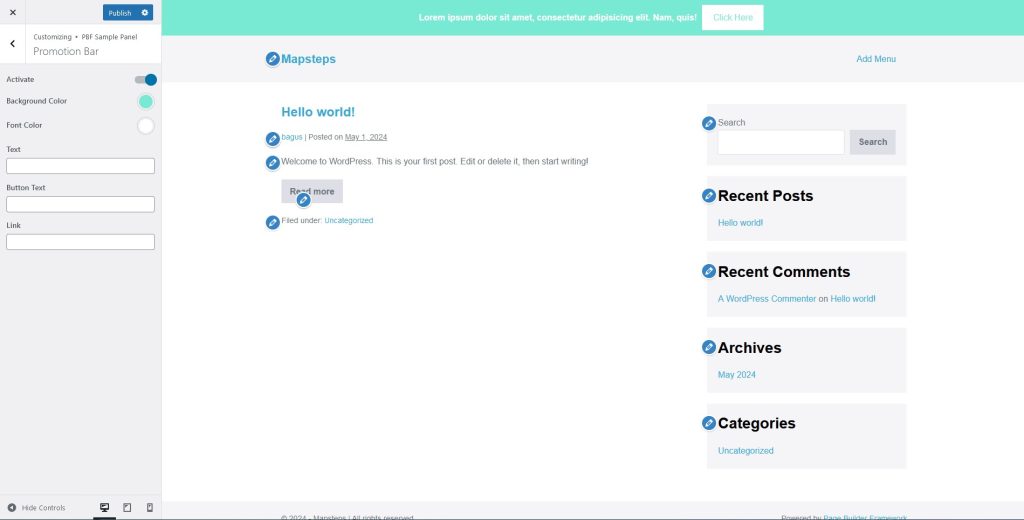
Now with both features activated in the Customizer, our website would look something like this:
Apply Custom Styles
Remember how we defined the default styles for Promo Bar & Call to Action Button earlier?
The last thing we need to do is to apply our custom styles. In the code snippet below we will check if custom colors are defined for our Promo Bar & CTA Button and override the default styles if necessary.
/**
 * Let's override our defaults if custom styles are defined.
 */
function pbf_sample_customized_styles() {

	// Book Now Button.
	if ( get_theme_mod( 'book_now_background_color' ) ) {
		?>
		.pbf-sample-book-now-button {
			background-color: <?php echo esc_attr( get_theme_mod( 'book_now_background_color' ) ); ?>;
		}
		<?php
	}

	if ( get_theme_mod( 'book_now_font_color' ) ) {
		?>
		.pbf-sample-book-now-button a {
			color: <?php echo esc_attr( get_theme_mod( 'book_now_font_color' ) ); ?>;
		}
		<?php
	}

	// Promotion Bar.
	if ( get_theme_mod( 'promo_bar_background_color' ) ) {
		?>
		.pbf-sample-promo-bar {
			background-color: <?php echo esc_attr( get_theme_mod( 'promo_bar_background_color' ) ); ?>;
		}
		.pbf-sample-promo-bar .pbf-sample-promo-bar-button {
			color: <?php echo esc_attr( get_theme_mod( 'promo_bar_background_color' ) ); ?>;
		}
		<?php
	}

	if ( get_theme_mod( 'promo_bar_font_color' ) ) {
		?>
		.pbf-sample-promo-bar .pbf-sample-promo-bar-button {
			background: <?php echo esc_attr( get_theme_mod( 'promo_bar_font_color' ) ); ?>;
		}
		.pbf-sample-promo-bar .pbf-sample-promo-bar-text {
			color: <?php echo esc_attr( get_theme_mod( 'promo_bar_font_color' ) ); ?>;
		}
		<?php
	}

}
add_action( 'wpbf_after_customizer_css', 'pbf_sample_customized_styles' );
Hooking into wpbf_after_customizer_css is the most efficient way to add dynamically generated CSS to Page Builder Framework. Your styles will be minified and merged with the existing styles generated based on the WordPress customizer settings.
Done!
I hope this gives you an idea of how you can add your own elements & customizer settings to Page Builder Framework. Of course, this is a very basic example on how Page Builder Framework can be extended. The possibilities are endless.
We’d love to see what you will come up with!
Download
Sample PluginStay in the Loop!
Sign up for our Newsletter & be the first to get notified about new updates & features!
About the Author
Hey, I'm David, founder of MapSteps & creator of the Page Builder Framework, Ultimate Dashboard, Better Admin Bar, WP Video Popup & other WordPress plugins that make agency life easier.
3 Comments
Hello
It was a good training
Is it possible to add a new option to the template customization through child theme?
Thank you for your help.
Sure, you can just add the code to your child-theme’s functions.php file instead for instance.
hi David
Thanks for the guide
To connect customize to template page of the code:
I used but it did not connect
Thank you for your help
code:
$wp_customize->add_panel( ‘default_controls’, array(
‘priority’ => 1,
‘title’ => __( ‘new panel’, ‘kirki’ ),
‘description’ => __( ‘This panel contains the default WordPress Controls’, ‘kirki’ ),
) );
$wp_customize->add_section( ‘text_section’, array(
‘title’ => __( ‘title’, ‘kirki’ ),
‘priority’ => 1,
‘panel’ => ‘default_controls’,
) );
add_action( ‘customize_register’, ‘kirki_demo_panels_sections’ );
function kirki_demo_controls( $controls ) {
$controls[] = array(
‘type’ => ‘text’,
‘setting’ => ‘text_demo’,
‘label’ => __( ‘label’, ‘kirki’ ),
‘description’ => __( ‘text’, ‘kirki’ ),
‘help’ => __( ‘This is some extra help. You can use this to add some additional instructions for users. The main description should go in the “description” of the field, this is only to be used for help tips.’, ‘kirki’ ),
‘section’ => ‘text_section’,
‘default’ => ‘default text’,
‘priority’ => 1,
);