How to Customize the WordPress Dashboard
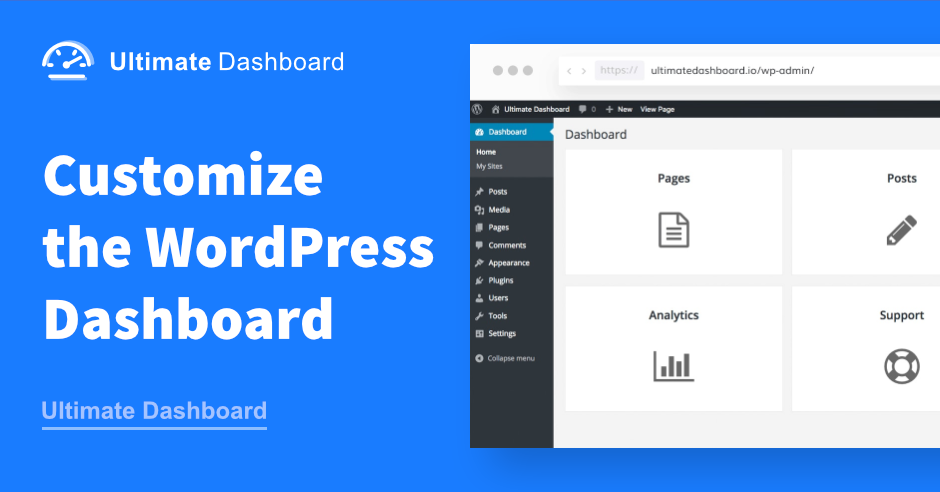
We’ve all been there. You slave away creating a WordPress website that meets or exceeds all of your client’s needs. Then, once you hand the site over, suddenly you’re bombarded with a million questions.
“How do I add a blog post?”
“Wait, what does this form mean?”
“If it’s my website, why does it say WordPress at the top?”
WordPress is a very user friendly system. That’s why it’s the most popular website building platform on the planet. But what’s user friendly to some might be a confusing mess to someone else.
This all boils down to one factor. The WordPress dashboard.
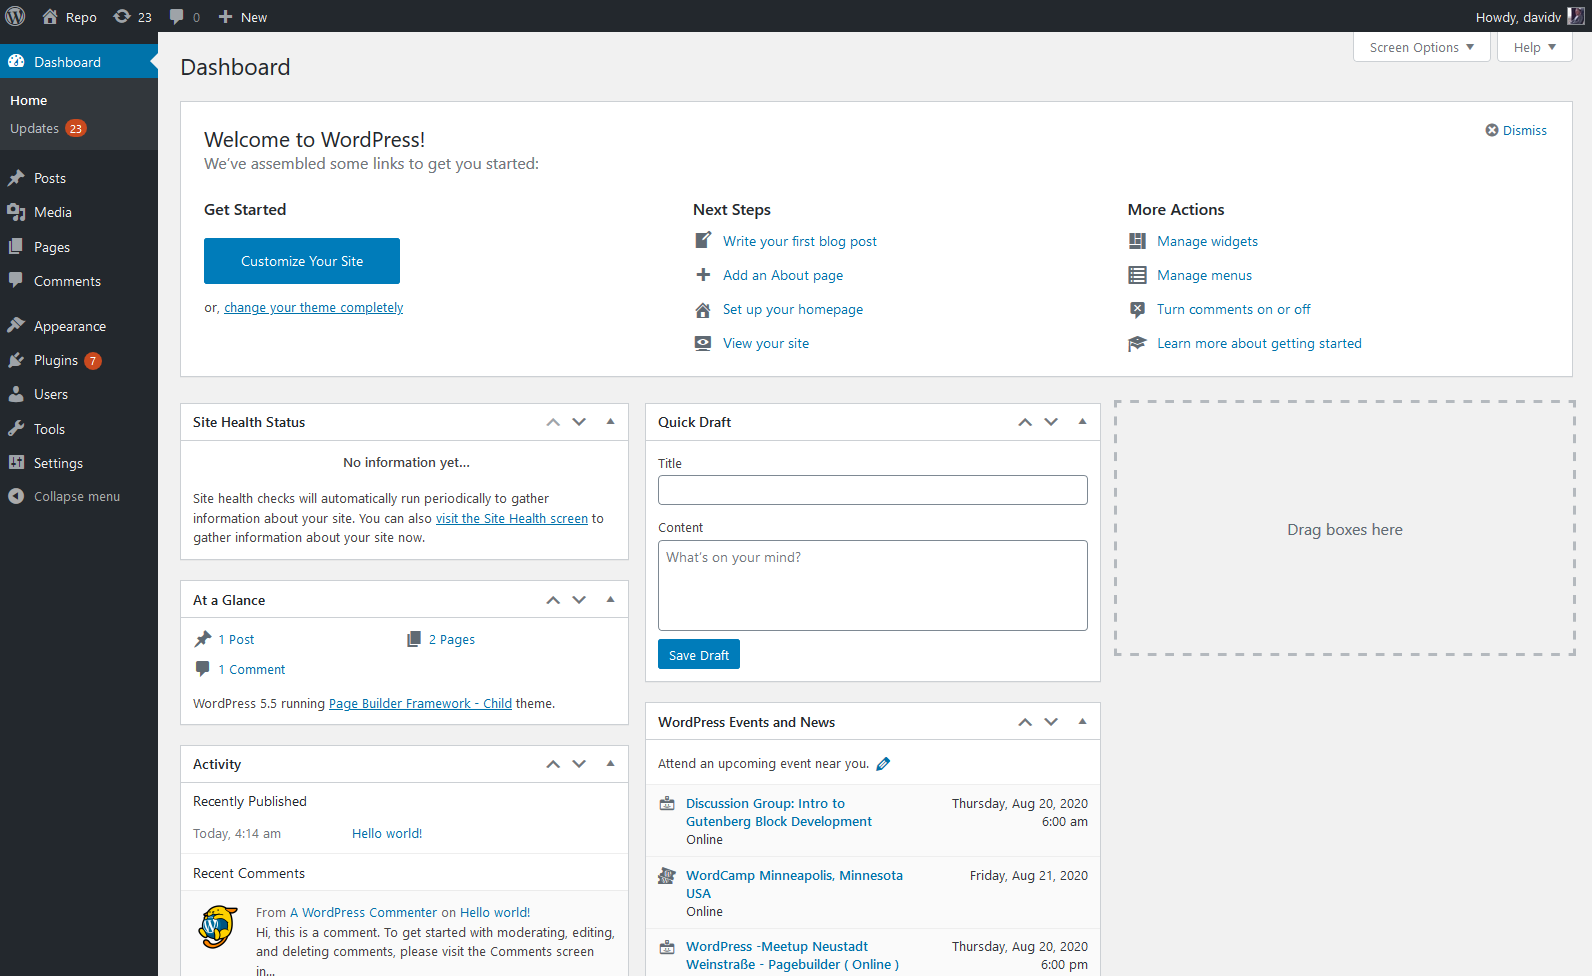
While a developer might look at this page and think “no problem,” someone with absolutely no experience could get easily overwhelmed by it.
That’s why it’s a great idea to customize the WordPress dashboard for your clients. It makes for a smooth transition, flawless user experience, and a lot less panicked questions crowding your inbox.
How Can You Customize The WordPress Admin Dashboard?
There are a number of actions that you can take that will make your client’s dashboard a much more straightforward and user friendly place.
Here are some of the steps you can take to customize the WordPress admin dashboard.
- Remove confusing or unnecessary widgets
- Create and add your own custom widgets
- Add the client’s color scheme and logo in place of WordPress branding
- Add instructional videos to help your client navigate the dashboard and WordPress admin area.
- Add a contact form so that the client can reach out to you directly from the dashboard
- Declutter the WordPress admin area by removing unnecessary items, such as the “Help” & “Screen Options” tab.
- Change the WordPress admin menu so that your client can only access certain areas of it.
Now that we know what can be done to help customize your client’s WordPress dashboard, it’s time to actually make it happen.
We’re going to walk you through how you can go about performing this vital task in a step by step process.
Option 1: Custom Coding
You could customize the dashboard by altering the code and building everything from scratch. As long as you’re a coding expert, this shouldn’t prove too difficult a task. However, it will be time consuming.
As you know, time is money in the design business. So, while you could customize the admin dashboard with coding, the question becomes should you do it?
Building a dashboard from scratch using code is going to be a long and laborious process. The more time you spend doing that work, the more you’re going to have to charge your client.
Before you jump up and start celebrating a larger check, you have to remember how important it is to keep your pricing competitive. If you’re charging custom code pricing while your competitors are utilizing other easier means, you’re going to price yourself out of business.
Don’t worry, there’s a cheaper and less time consuming way for you to give your clients the user experience of their dreams without forcing them to break the bank.
In fact, even with this option you can add things like Custom CSS to your WordPress dashboard and admin area.
If you’re interested in custom coding for your WordPress dashboard, there are a slew of articles out there on this topic. However, for the purposes of this article, we’re going to focus on a specific WordPress plugin that simplifies the process and saves time.
Option 2: Use The Ultimate Dashboard Plugin
Ultimate Dashboard is a free WordPress plugin that will allow you to simplify and customize your dashboard with minimal effort.
It comes in two versions, the standard free plugin, and a paid PRO version that comes with some additional features.
When you’re using the free version of Ultimate Dashboard, there are several tasks you can accomplish to build the easiest user experience for your client.
- Remove Widgets – You can remove all the erroneous widgets that clutter up the WordPress dashboard. This limits confusion by showing your client only what they need to see.
- Create Widgets – You can create and add your own widgets to replace the generic WordPress options. These can be text based, icon based, or HTML widgets.
- Clean up the WordPress Dashboard by removing the Screen Options & Help tabs or change things like the WordPress version & footer text.
- Add custom CSS to the dashboard theme using the plugin. This can also be applied to the entire admin area.
- Customize the login screen, removing the WordPress logo and inserting your client’s logo instead. You can also change around the color scheme to match your client’s branding. This makes for a much more professional looking product.
- Create custom admin pages for your clients using HTML and CSS coding through the plugin.
One strong benefit of Ultimate Dashboard is the time that it saves you. While there are some areas where you can use custom coding to accomplish your goals, you’re able to skip the coding entirely if you want.
You’re also able to customize your WordPress experience without having to go through the time consuming task of creating a child theme or custom plugin.
So, how does one go about using Ultimate Dashboard to accomplish these feats? We’re going to cover that in a step-by-step Ultimate Dashboard walkthrough.
Step 1: Install the Plugin
There are two different ways to download and install the Ultimate Dashboard Plugin. The first is by accessing the platform through the official Ultimate Dashboard website.
Right at the top of the page you’re going to see two options. The first is marked “Download (Free Version)” and the other is “Ultimate Dashboard PRO”. Click Download to get started.
This will take you to a page that lists two different plan options for the plugin.
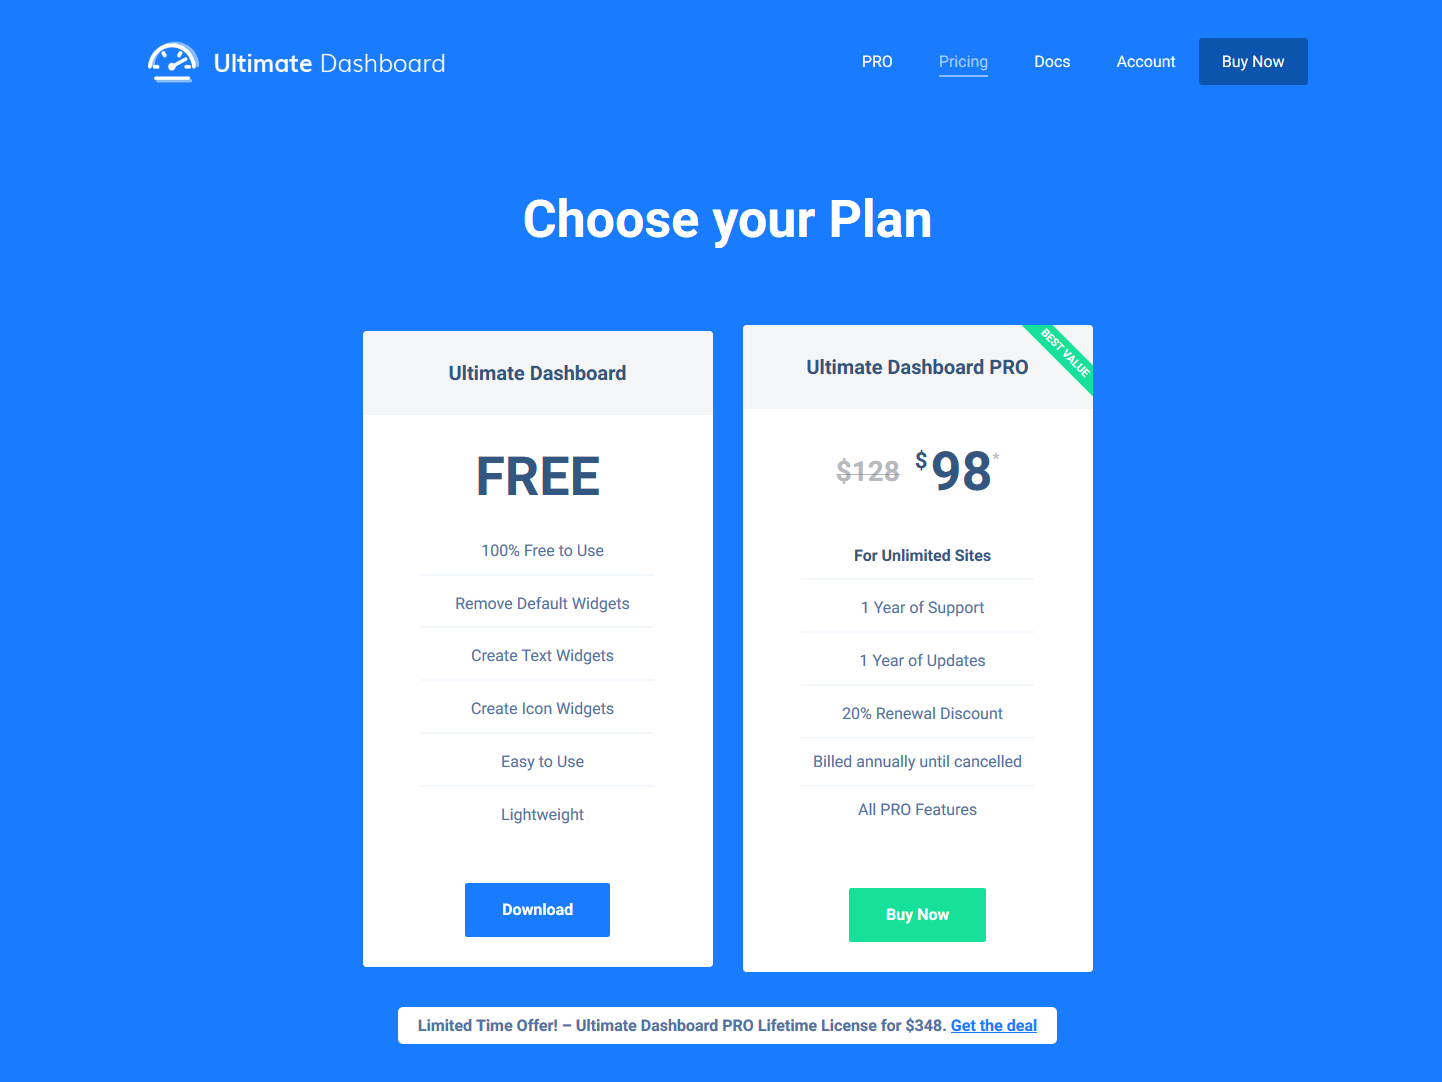
The first is the regular free version. It allows you to remove default widgets, create your own dashbaord widgets and much more.
We’re going to go into detail on the PRO version later in this walkthrough, but for now we’re going to select the free version.
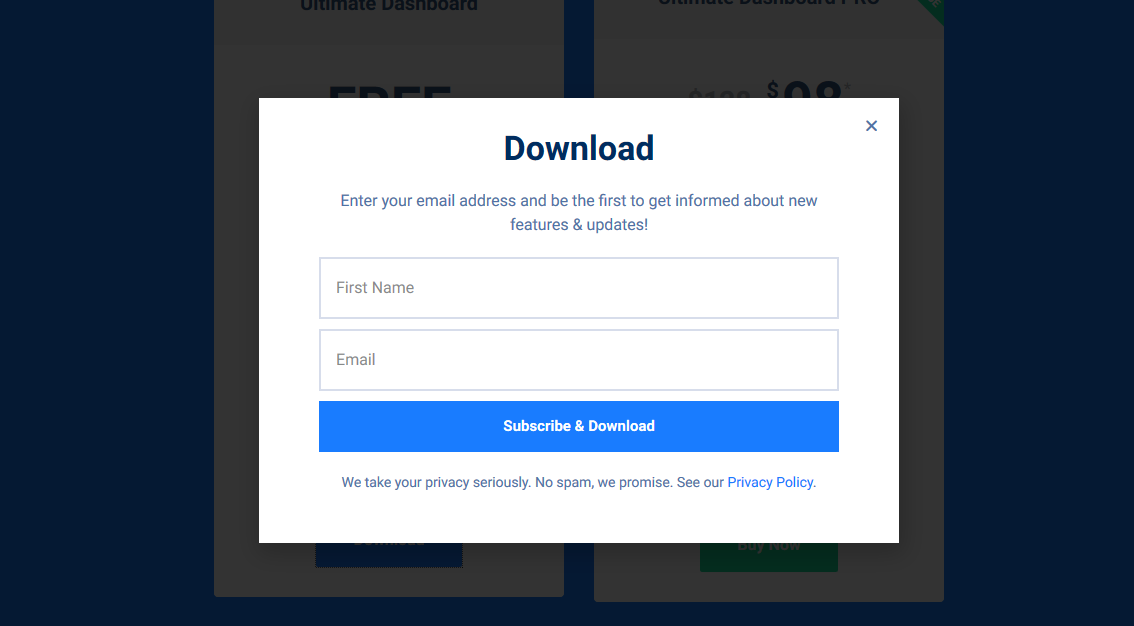
A pop-up window will appear asking for your first name and email address. Fill these boxes out to get moving.
Once that information has been entered, you will see a new screen thanking you for your subscription. A download should immediately begin. If it doesn’t for some reason, there’s a download button on the page.
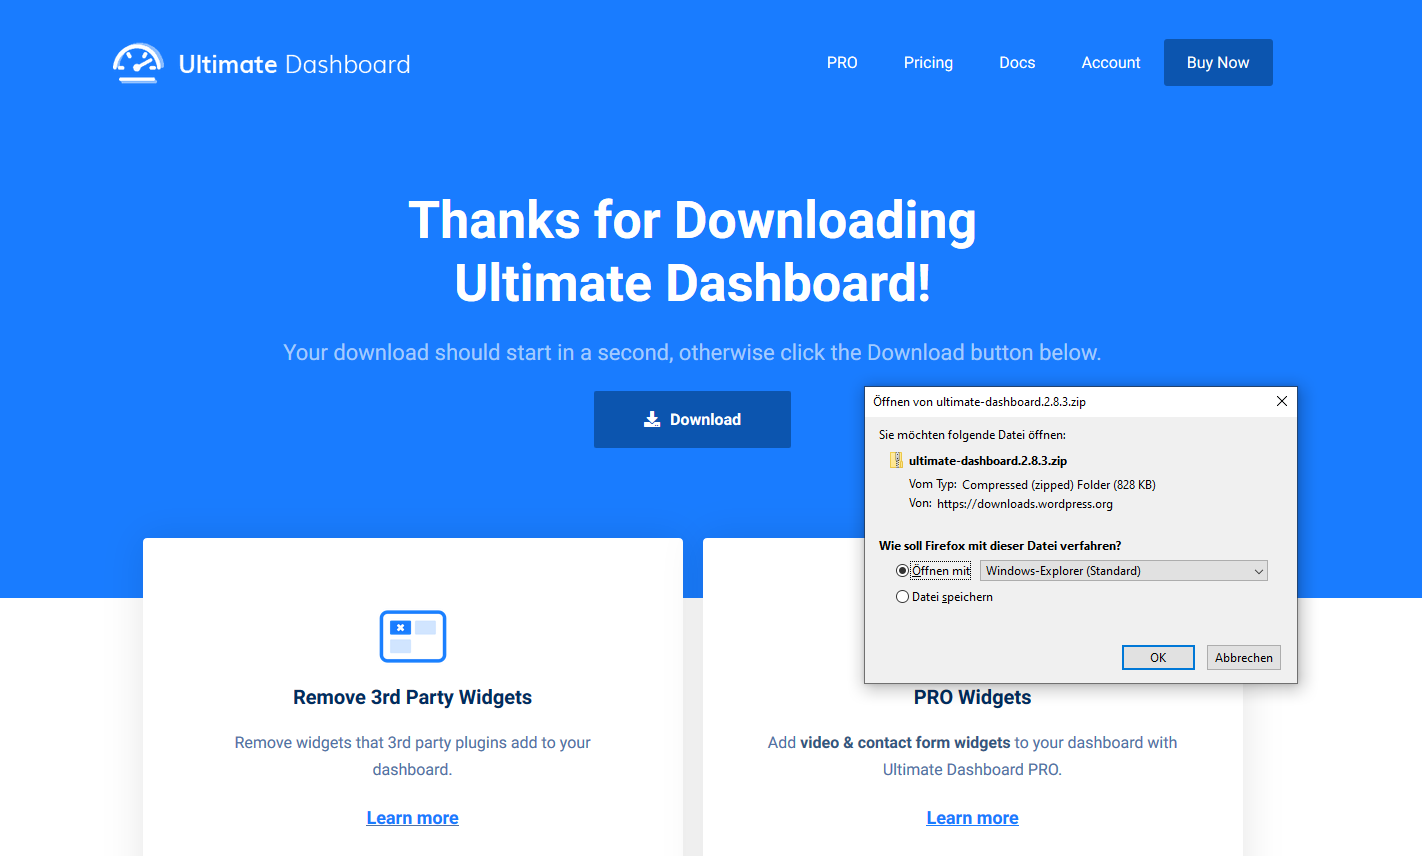
The other option is to download the plugin through the official WordPress Plugin directory.
With WordPress open, click on “Plugins” on the left side admin menu.
Type in “Ultimate Dashboard” in the search bar on the upper right. This will take you to a series of results, the first of which should be the Ultimate Dashboard Plugin.
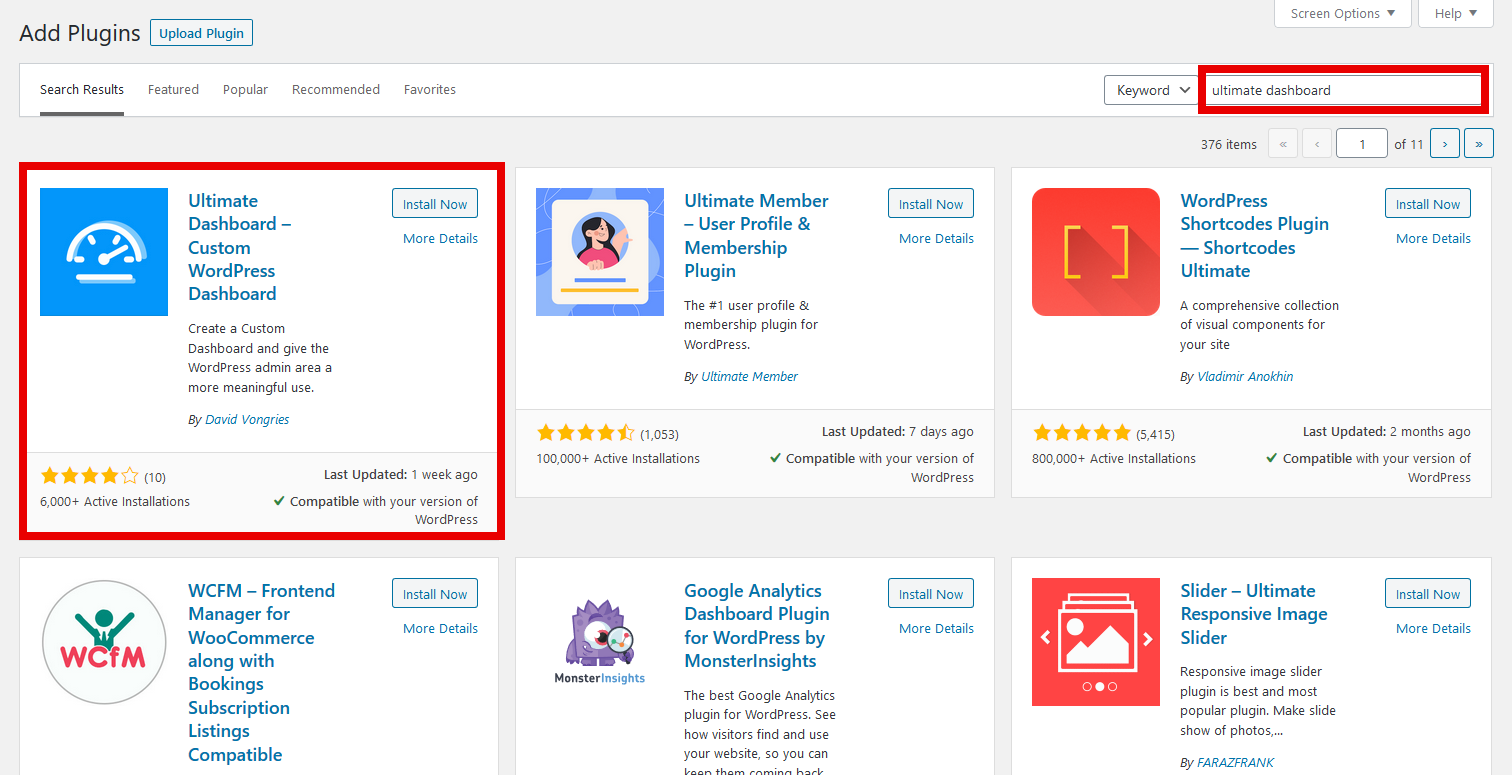
Click on “Install Now” to get started. Then click activate.
Step 2: Open the Settings Menu
Once the plugin has been installed & activated, it’s time to start using it.
You’ll notice a new menu item on the left side bar that is labeled “Ultimate Dashboard”.
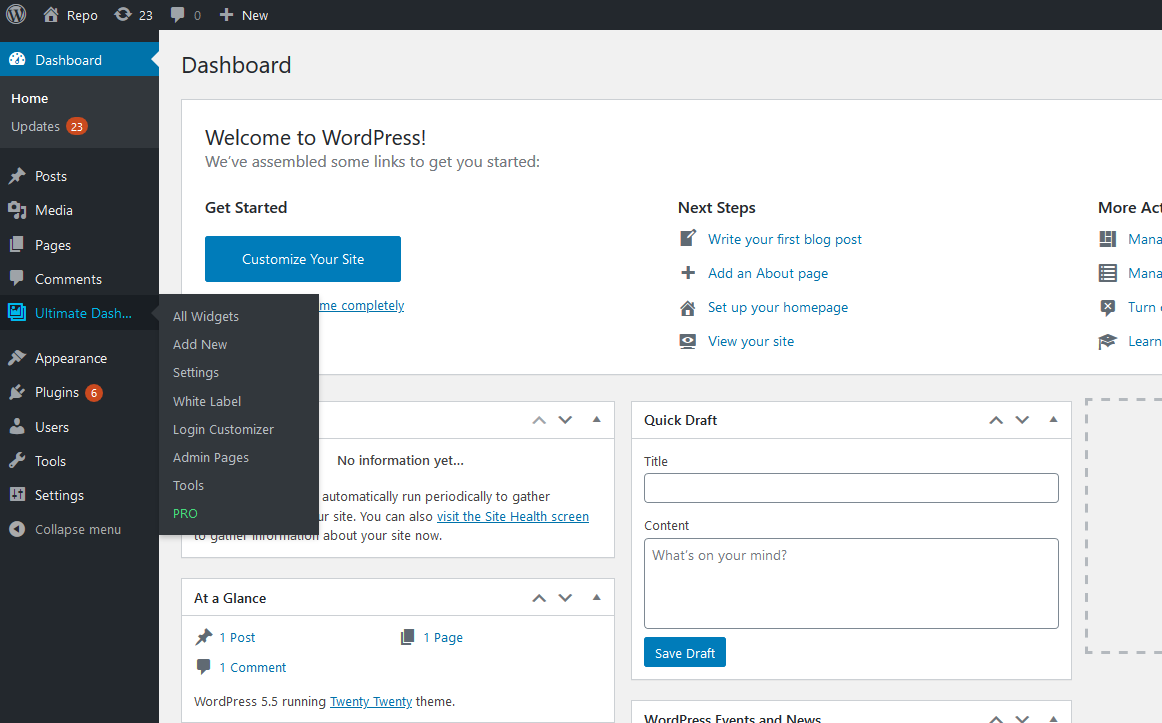
When you hover your cursor over this item, you’ll be presented with a number of options. Among them are
- All Widgets
- Add New
- Settings
- White Label
- Admin Pages
- Admin Menu
and a bunch of others. For the purposes of this walkthrough, we’re going to select “Settings” first.
Step 3: Disable Default Widgets
That’s going to take you to a screen that has a list of dashboard widgets.
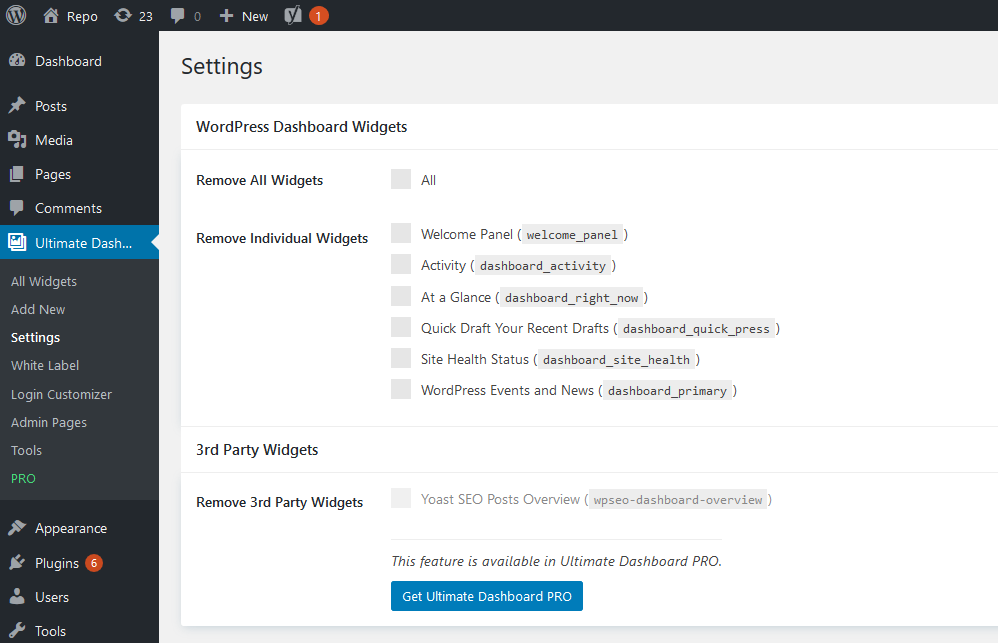
Here, you have a bunch of individual widgets which come standard with most WordPress business websites.
In this case, they are:
- Welcome Panel
- Activity
- At a Glance
- Quick Draft Your Recent Drafts
- Site Health Status
- WordPress Events and News
Underneath that, you’ve got third party widgets that have been added by other plugins, but we’re not going to worry about those… yet.
This is a list of the widgets that are currently gumming up the dashboard of your beginner level client. Are some of these widgets useful? Sure they are. But they’re useful for someone like you who has more than a working knowledge of WordPress and how it works.
They’re going to completely confuse the average John Q. Client.
Here is where you get to make a choice that is completely based on your client’s level of WordPress website competency. You can choose to take a few or all of these widgets away. Maybe you don’t want to bug your client with WordPress Events and News but you think that the Activity Widget or the ability to Quick Draft can be useful.
You’ll select all of the widgets except for the ones you’re going to keep. Then, scroll to the bottom of the page, click Save, and then check out all the fancy newness of your client’s dashboard.
But, if your client knows absolutely nothing whatsoever and you want to make this as easy as humanly possible, you’re going to want to start from scratch.
That’s when you check the box at the top of the Settings page marked “Remove All Widgets”.
Click Save and suddenly you have a lot more room to work.
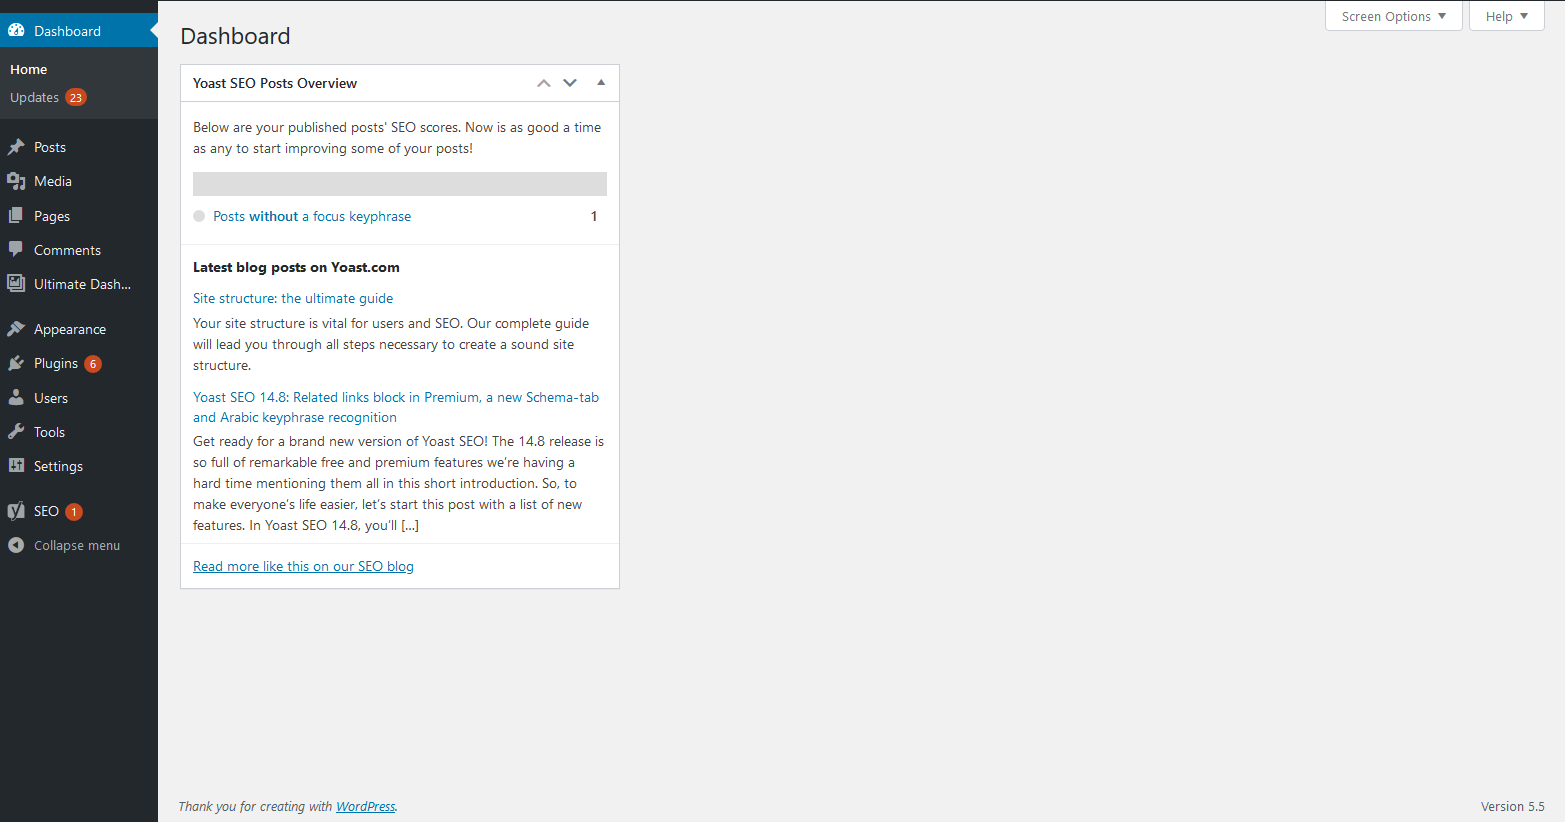
That’s a lot cleaner than it was. You’ll notice on this example dashboard, we still have widgets for Yoast SEO. These are third party widgets, so you’re not going to be able to get rid of them without Ultimate Dashboard PRO.
Step 4: Creating New Widgets
Now it’s time to create the widgets that your client is going to be using.
Run your mouse over the Ultimate Dashboard menu item again. This time, select “Add New”.
This takes you to the widget creation screen.
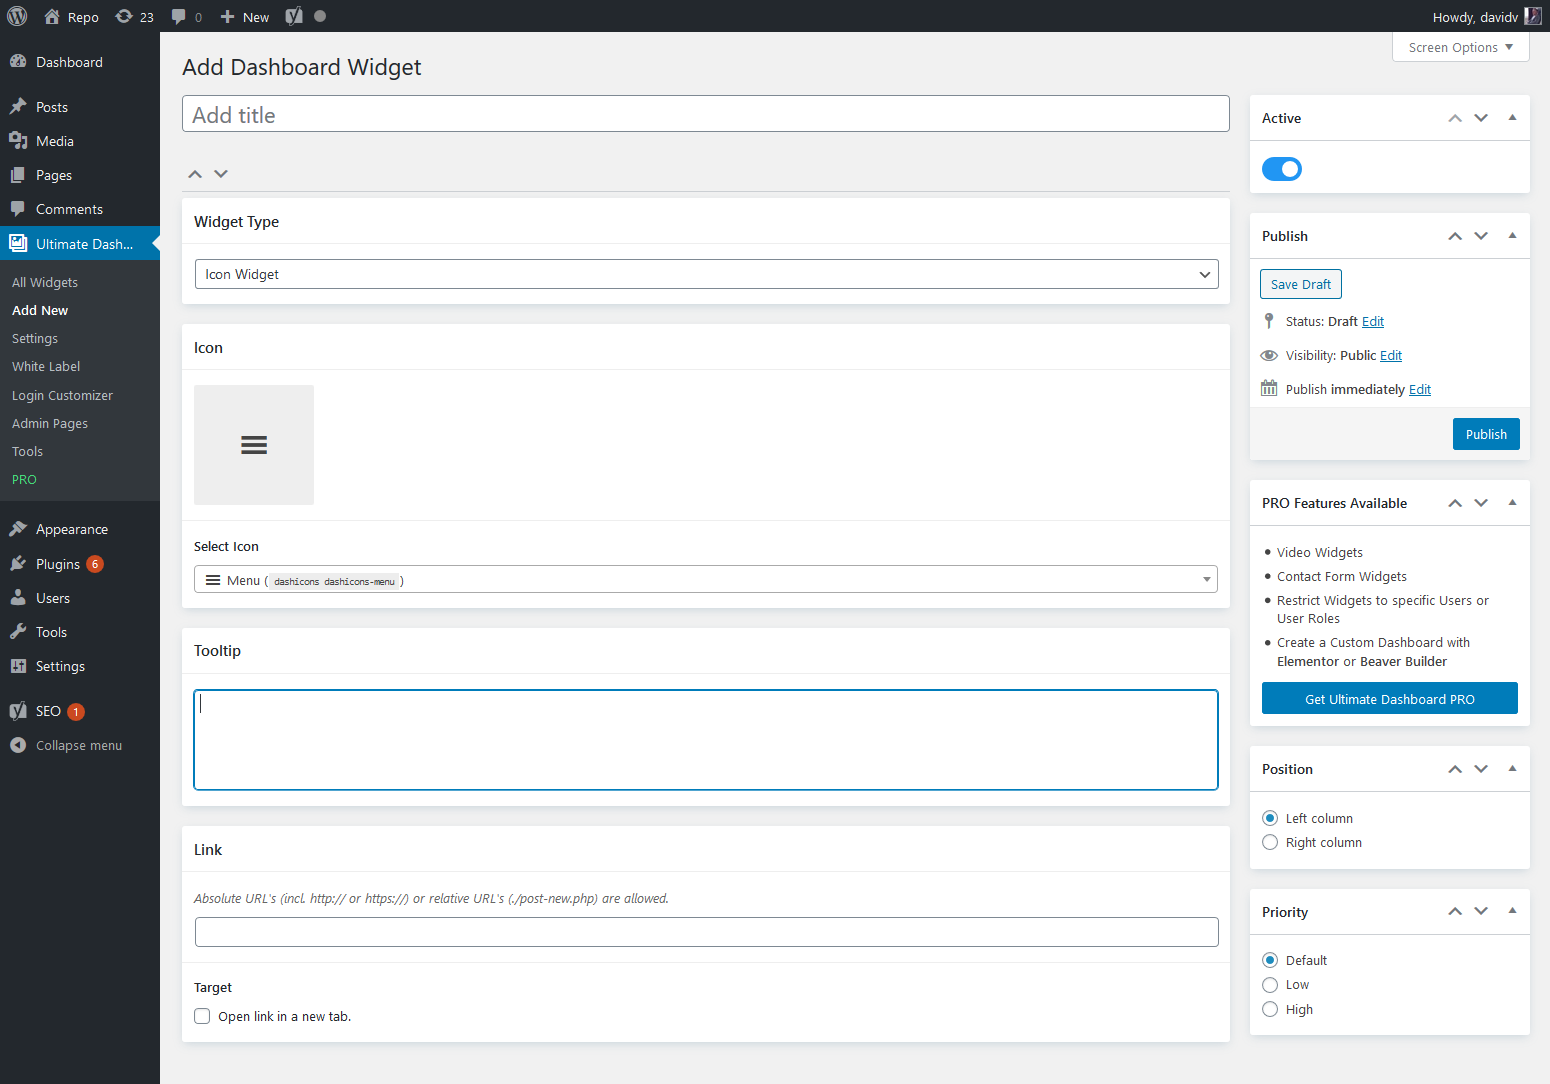
At the top of the page, you’re going to add the title of your new widget. Let’s say you want to give your client a simple way to add a new post. You might want to call this new widget “Add Post”.
Type in the title and then move down to the widget type. We have “Icon Widget” selected. You can also select “Text Widget” or “HTML Widget” when using the free version.
When you create an icon widget, it’s going to appear on the dashboard marked by an icon that you select. In the Icon menu, click on the drop down menu that says “Select Icon” and browse through the choices that you are given.
Scrolling further down the page, you’ll see a section marked Tooltip. This is where you can write instructions for your client.
So, if it’s a widget that’s going to help them create a new post, you’d write something like “This widget is where you click to create a new post”
Underneath that, you’re going to have a section called “Link”.
This is where your icon widget will link to once it is clicked. If this is our hypothetical widget that will help your client create a new post, you’re going to enter the link for new post creation.
The simplest way to do this is by going up to the side menu item for new posts, right clicking on it, and copying the URL.
Once you’re done, click Publish in the upper right.
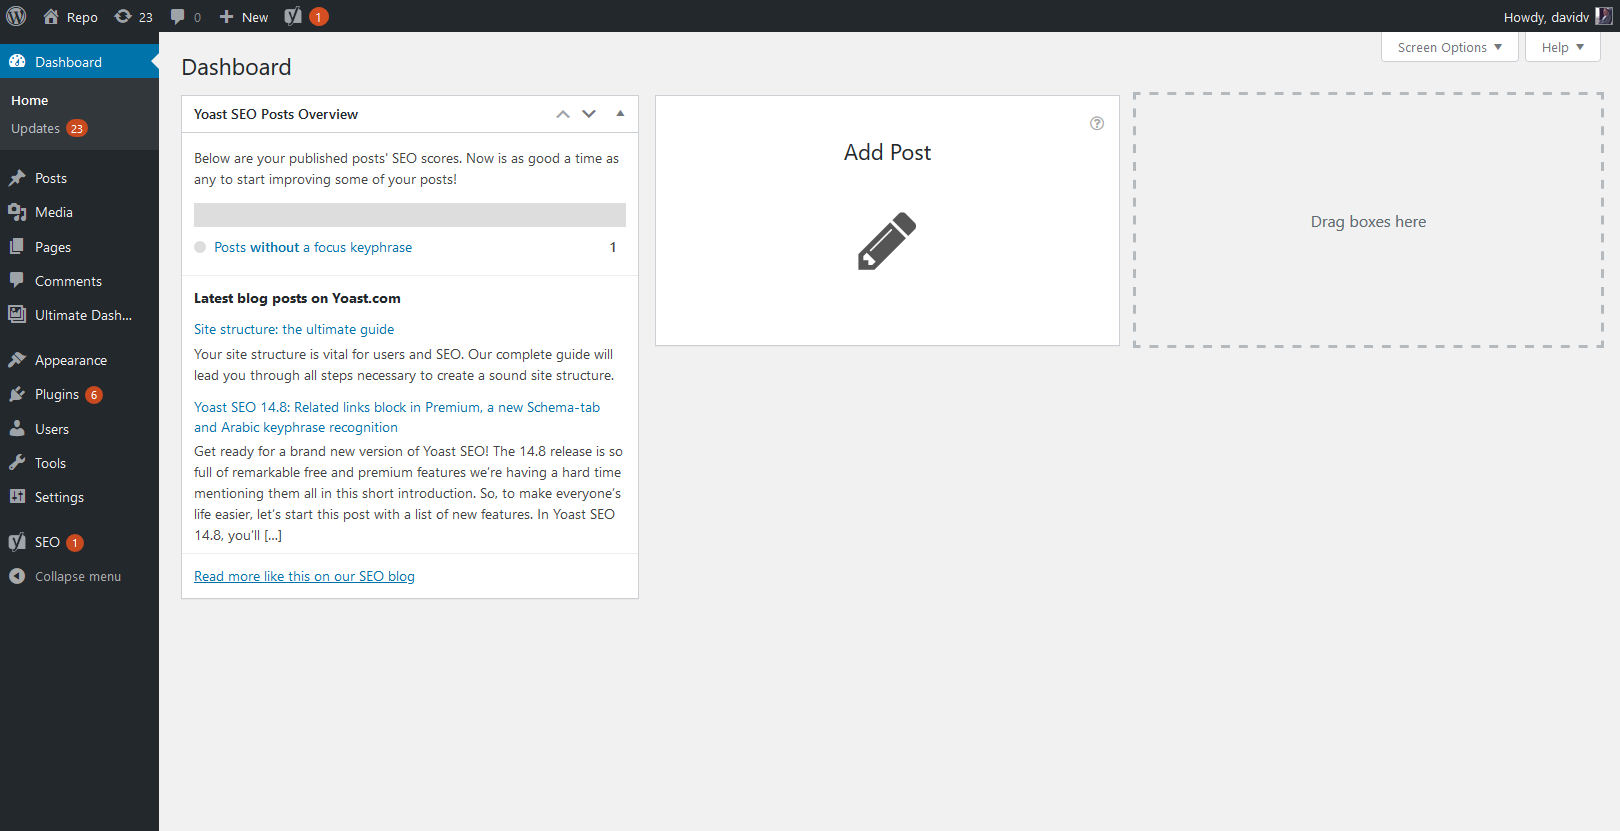
And there it is. Our new widget sitting on the custom dashboard. If you were to hover over the small question mark in the widget’s upper right corner, you’d get the tooltip that we entered. So, it’s completely foolproof for your client.
Repeat this process for every other widget that you think they might need.
These widgets can be customized as you see fit. On the settings page, you also have the option of color coding them as well. This can be done in accordance with your client’s branding.
Step 5: Customize the WordPress Login Screen
In the Ultimate Dashboard menu, select “Login Customizer” to get started customizing your WordPress login page.
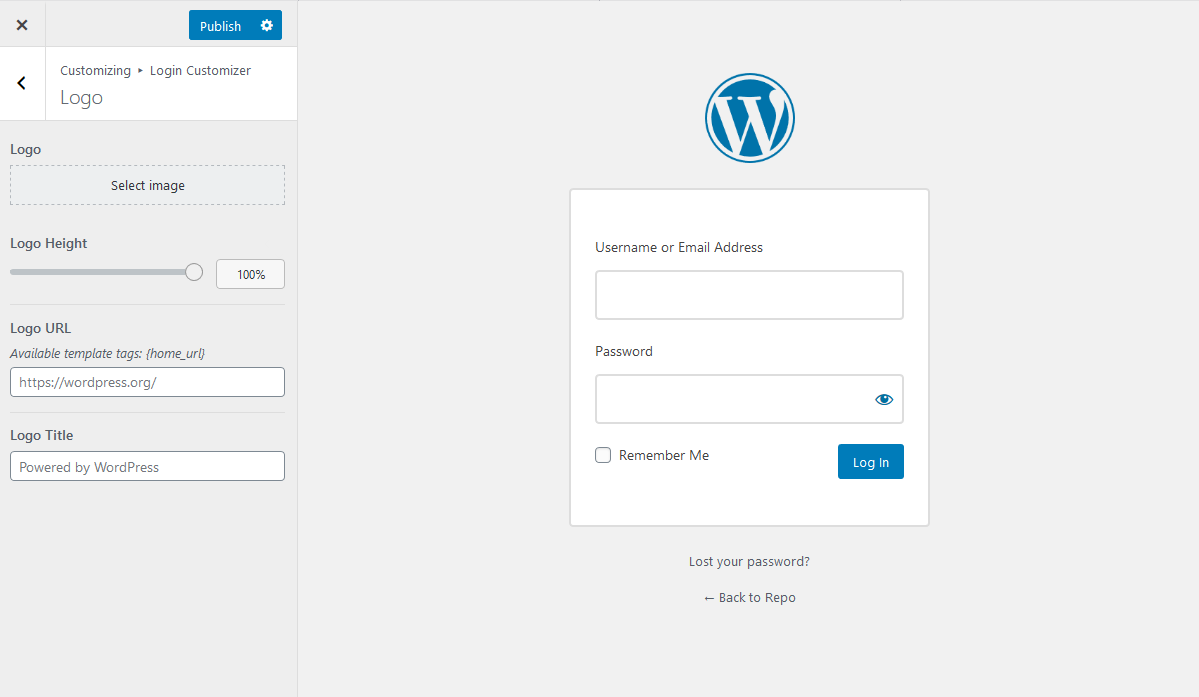
On this page, you’re given a sample of what your login looks like. In the above image, it’s pretty much the regular old WordPress login that we’ve all seen a million times.
Using the menu items on the left side, you’re able to play around with the logo. You can change its size or even put your client’s logo in place of the WordPress W. You can customize the background, the login forms, the input fields, and more.
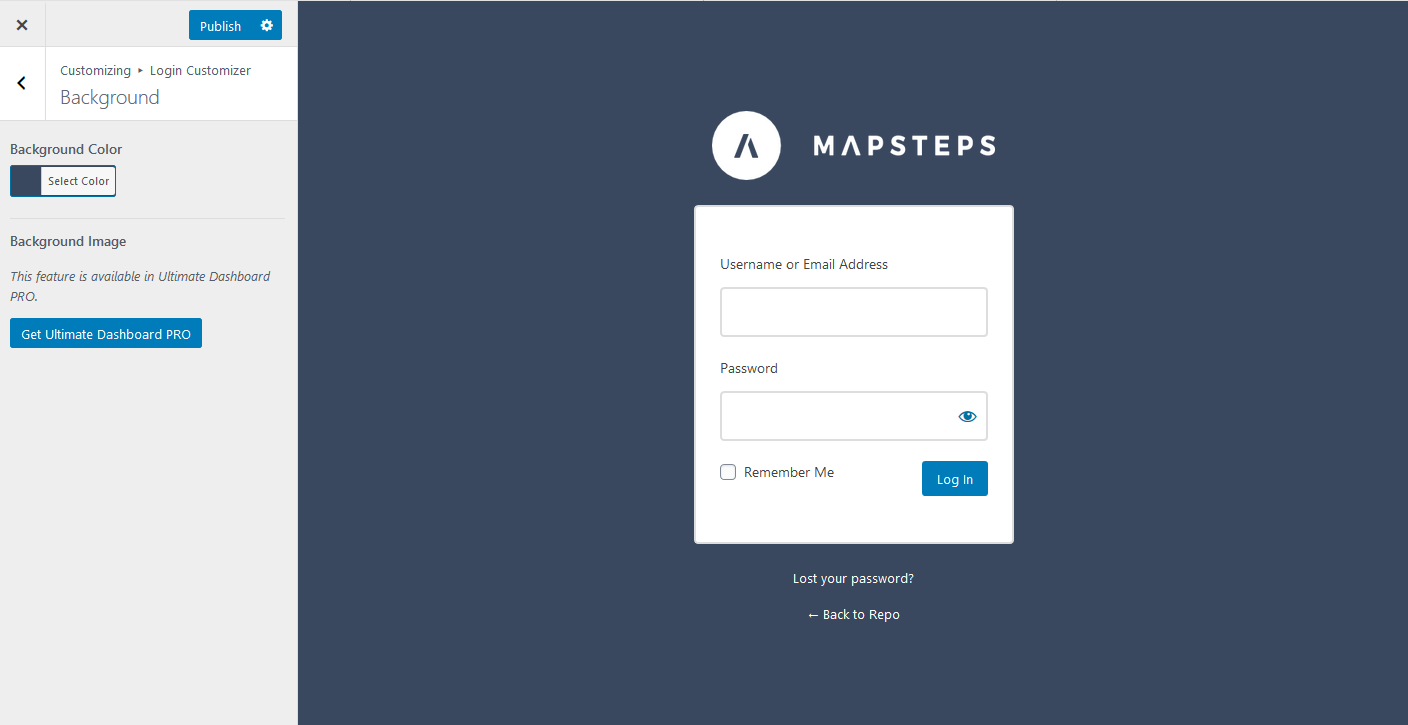
Once you’ve gotten the look and feel of the interface where you want it, it’s time to click the Publish button at the top of the page and bask in the custom greatness of your new, customized WordPress login screen.
But what if you wanted to take this process further? What if you wanted to build a custom WordPress dashboard with your page builder? What if you don’t want that Yoast SEO dashboard widget gumming up your otherwise immaculate and foolproof dashboard?
For that, you’re going to need Ultimate Dashboard PRO.
Option 3: Ultimate Dashboard PRO
Ultimate Dashboard PRO is the paid version of Ultimate Dashboard. It allows you to do everything that the free plugin can do, plus so much more. It basically is the all-in-one solution for you to customize your WordPress dashboard.
Some of the features of Ultimate Dashboard Pro include:
- Remove 3rd-party widgets – Removal of third party widgets like the Yoast SEO widget we were unable to get rid of earlier.
- Video & Contact Form Widgets
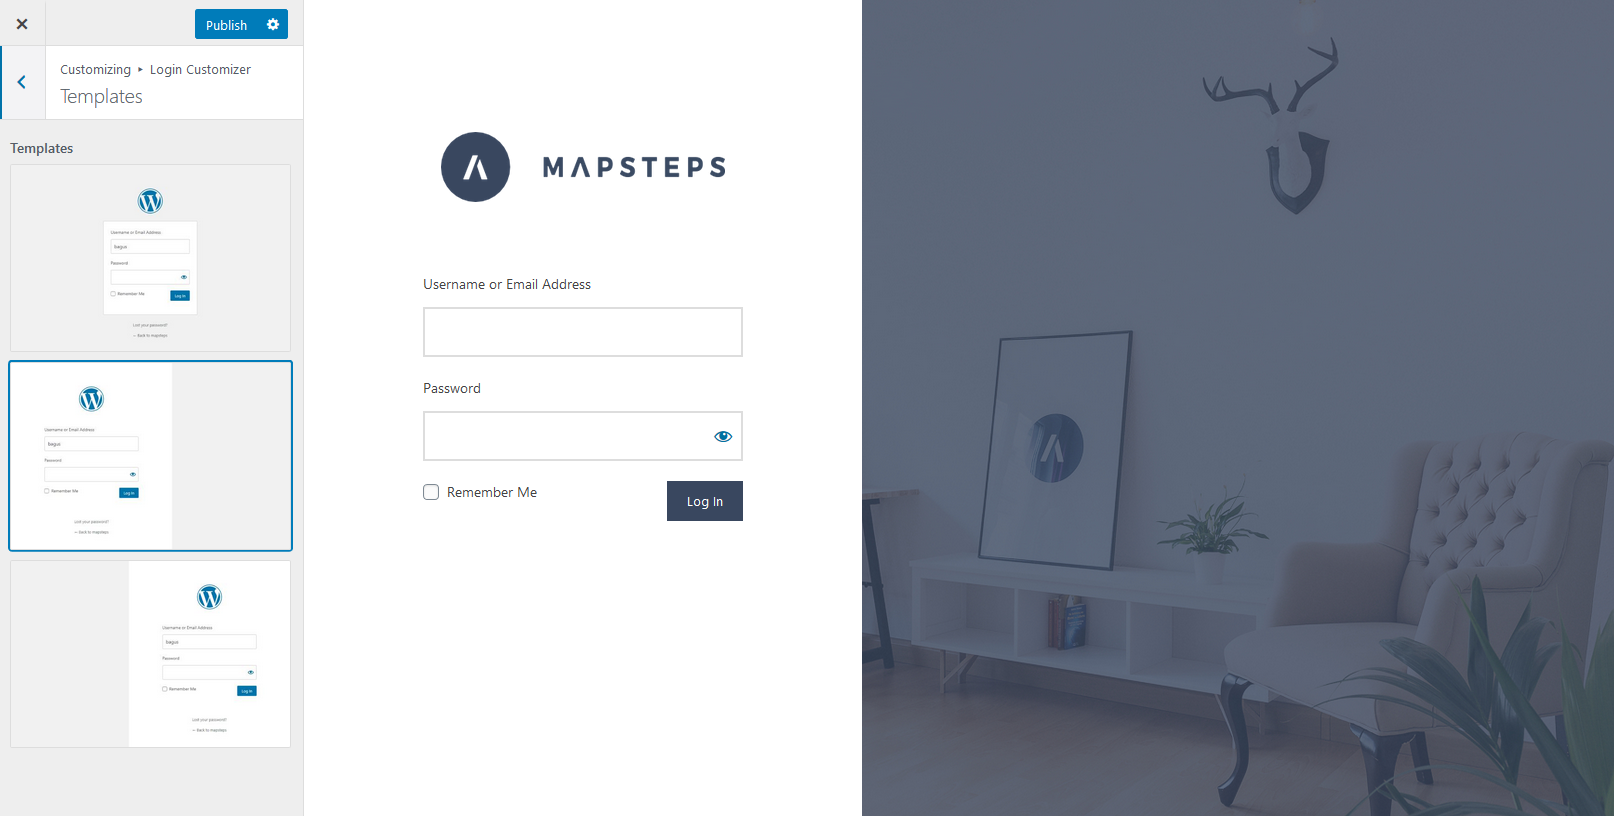
- Advanced Login Customizer – this will give you the ability to change the layout of your login page & add a background image.
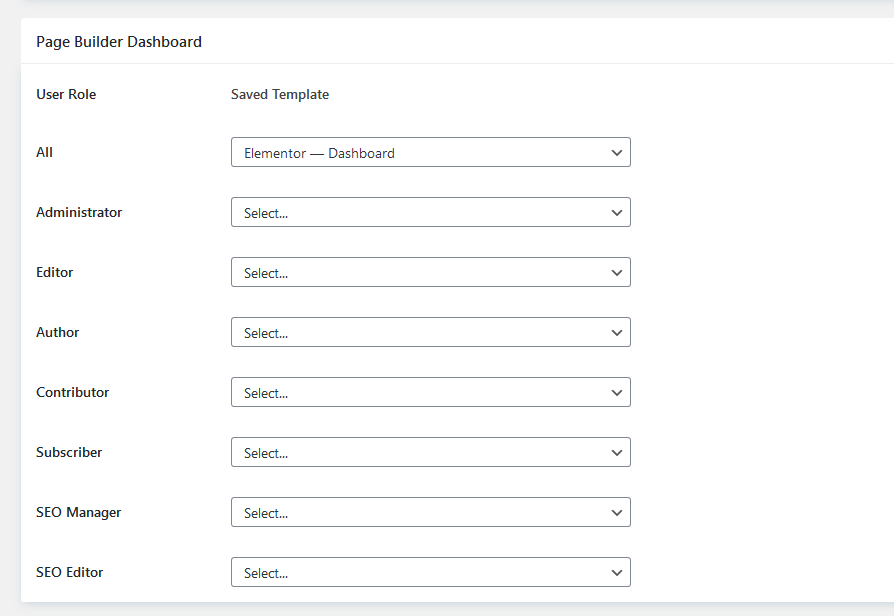
- User Role Access – This feature allows you to restrict what widgets are available to specific users or user roles.
- Page Builder Support – This gives you the ability to use your saved Beaver Builder or Elementor layout to replace the WordPress dashboard or use it alongside the widgets you have created.
- White Label WordPress – You can develop a full on White Label custom dashboard using your own branding.
- WordPress Muiltisite Support – Total compatibility with WordPress multisites.
- Advanced Admin Pages – You can create advanced WordPress Admin Pages with Elementor or Beaver Builder.
- Admin Menu Editor – Hide, rename & rearrange items inside the WordPress admin menu for each available user role.
Clearly, Ultimate Dashboard PRO is a quality purchase, but how do you actually use it? Let’s go through the process step by step.
Step 1: Purchase the Plugin
You can purchase the PRO version of Ultimate Dashboard through the plugin’s official website.
When choosing the PRO plan, you’ll be asked for payment information.
Once you have purchased the plugin, you’ll receive an email that will contain your license key and download link.
If you waited too long and the download link in your email has expired, you can always download the plugin from your account page on the Ultimate Dashboard website with an active license.
Step 2: Install the Plugin
Using either the download link in your welcome email or the one found on your account page, download the plugin.
Once that is done, you’re going to have everything in a zip file, which makes this whole process incredibly easy. There’s no need to unzip the file. Just go into the Plugins menu in WordPress and choose “Add New”.
Click the button at the top, which says “Upload Plugin”, then select the zipped file to upload everything at once into WordPress.
Next, you’ll click Activate Plugin to get things started. If you were using the free version of Ultimate Dashboard, you’re going to have to deactivate that in the Installed Plugins menu before you can use PRO.
Step 3: Customize Your WordPress Dashboard
Now that you’re using the PRO version of Ultimate Dashboard, you’ll note that previously grayed out sections of the Settings page are now available.
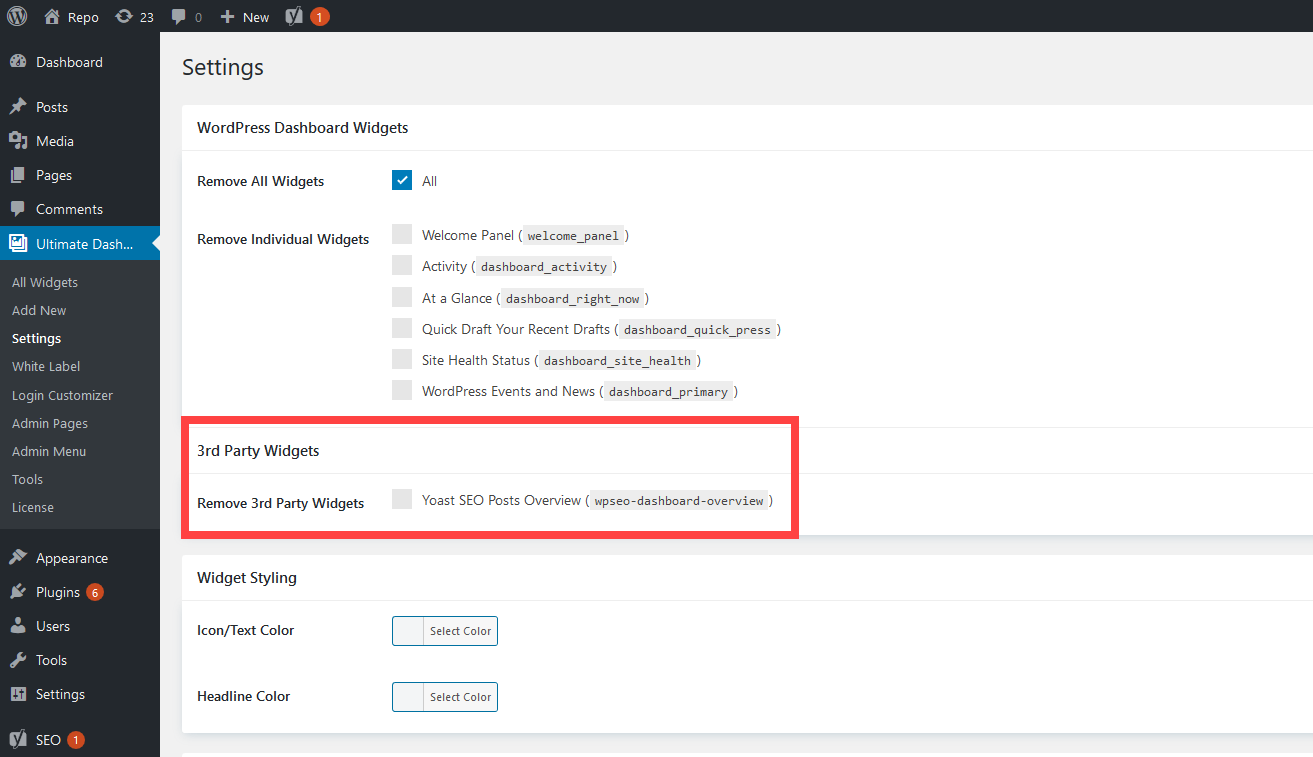
You can now remove all of the WordPress Widgets and third party options like the Forms widget or Yoast SEO.
Once you do that, your dashboard is a clean slate that is ready for customization.
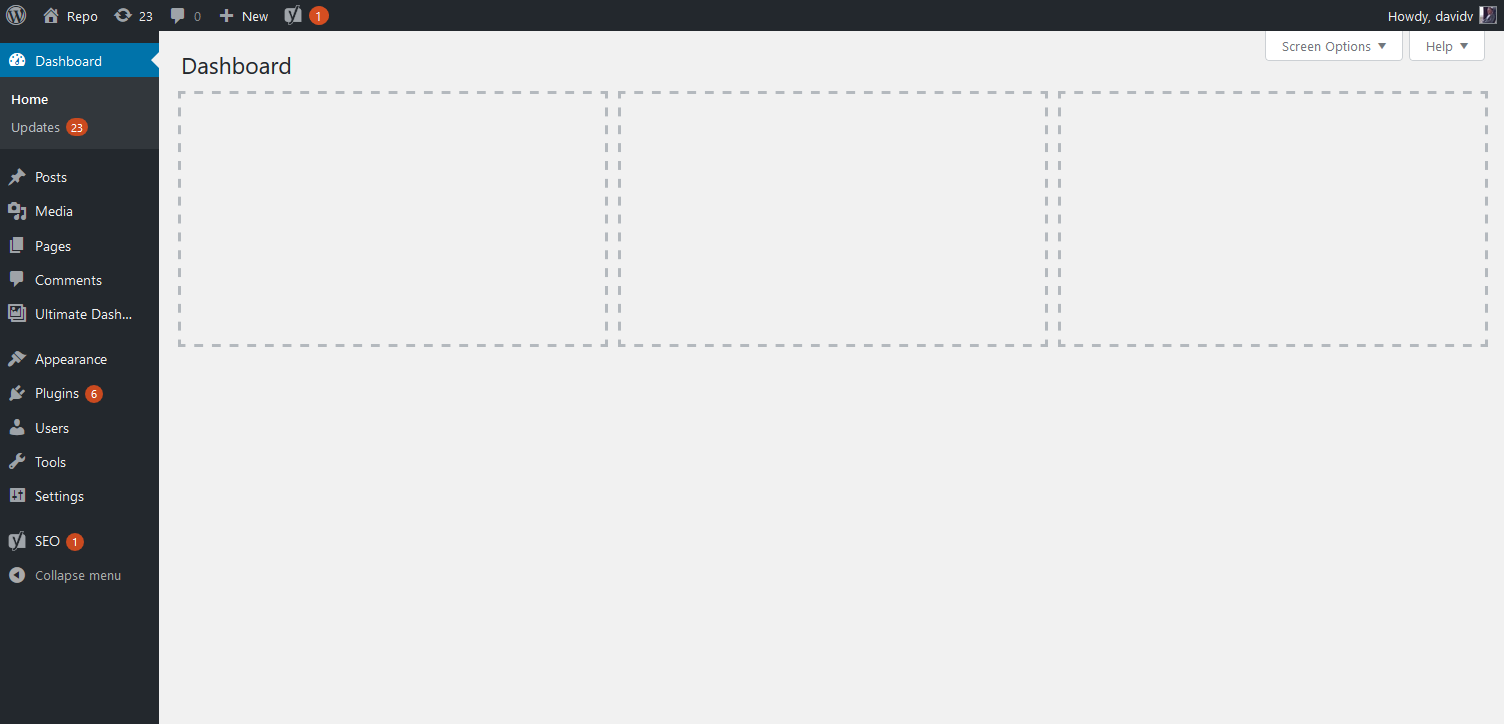
It’s time to start creating your widgets. You can create your standard icon, text, and HTML widgets, but you also have the option to make PRO widgets, such as contact forms and videos.
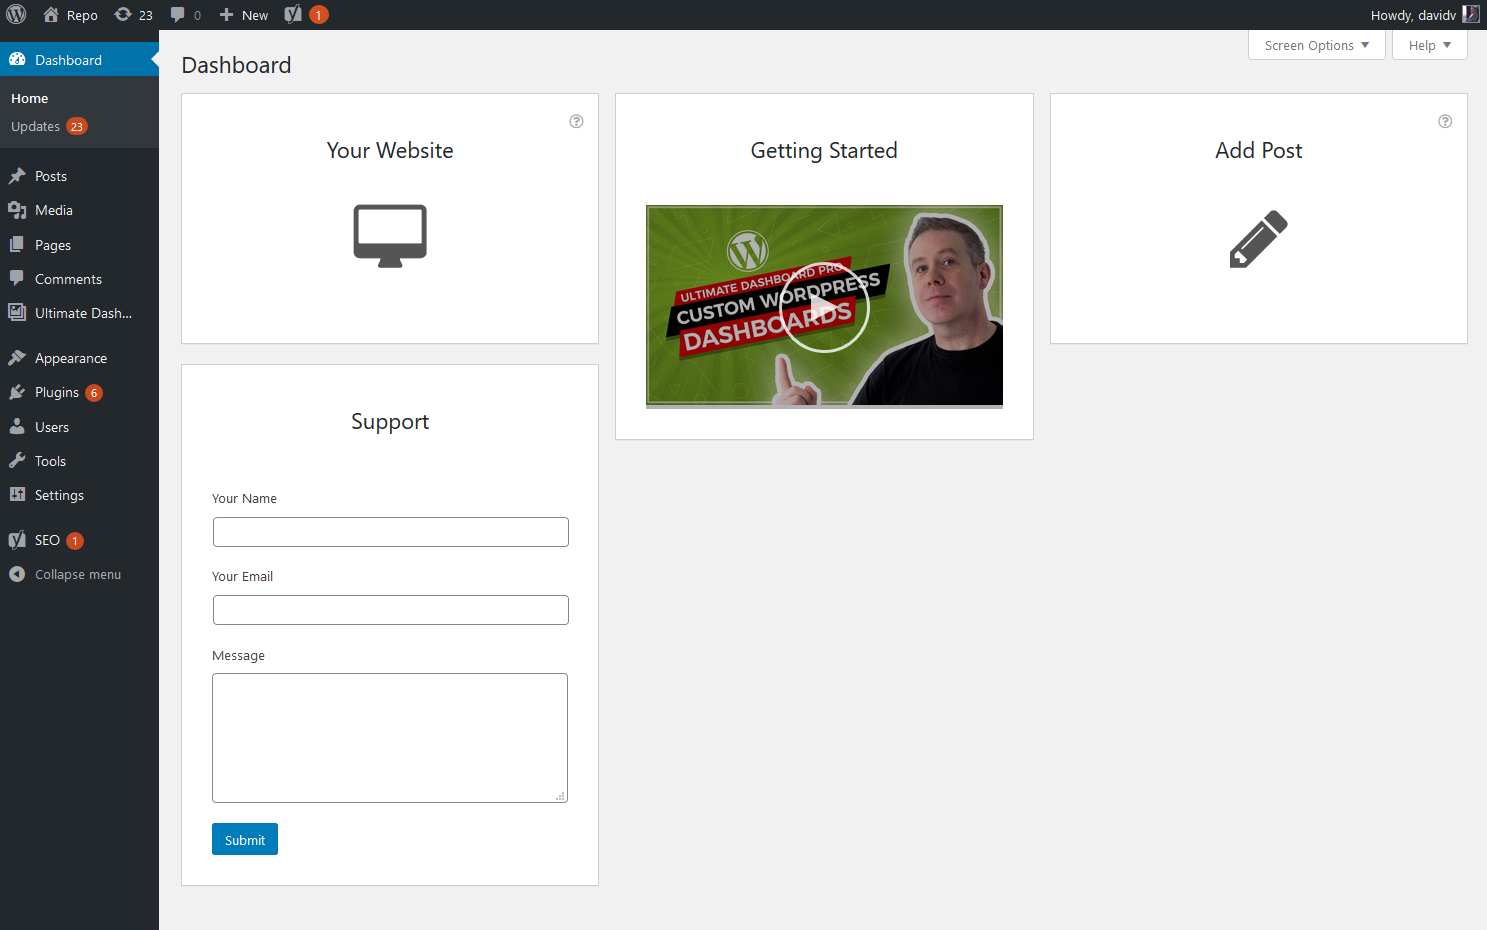
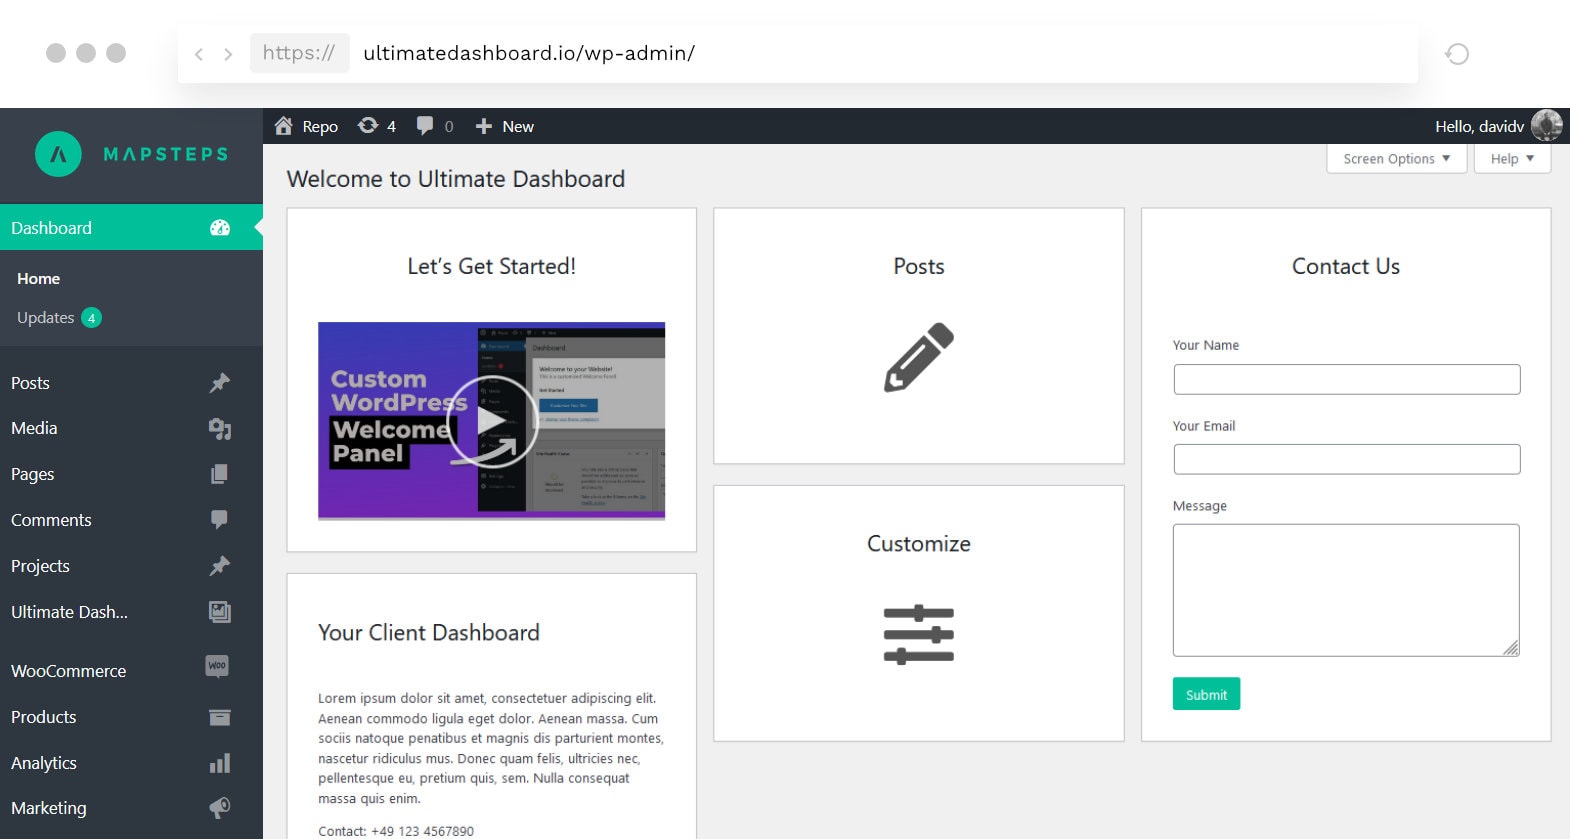
There you have it. The above dashboard is super simple and straightforward. We have widgets for your client to visit their website & reach out for support on the left hand side. In the center, we’ve got an instructional video, and on the right we have a the “Add Post” widget that we have created earlier.
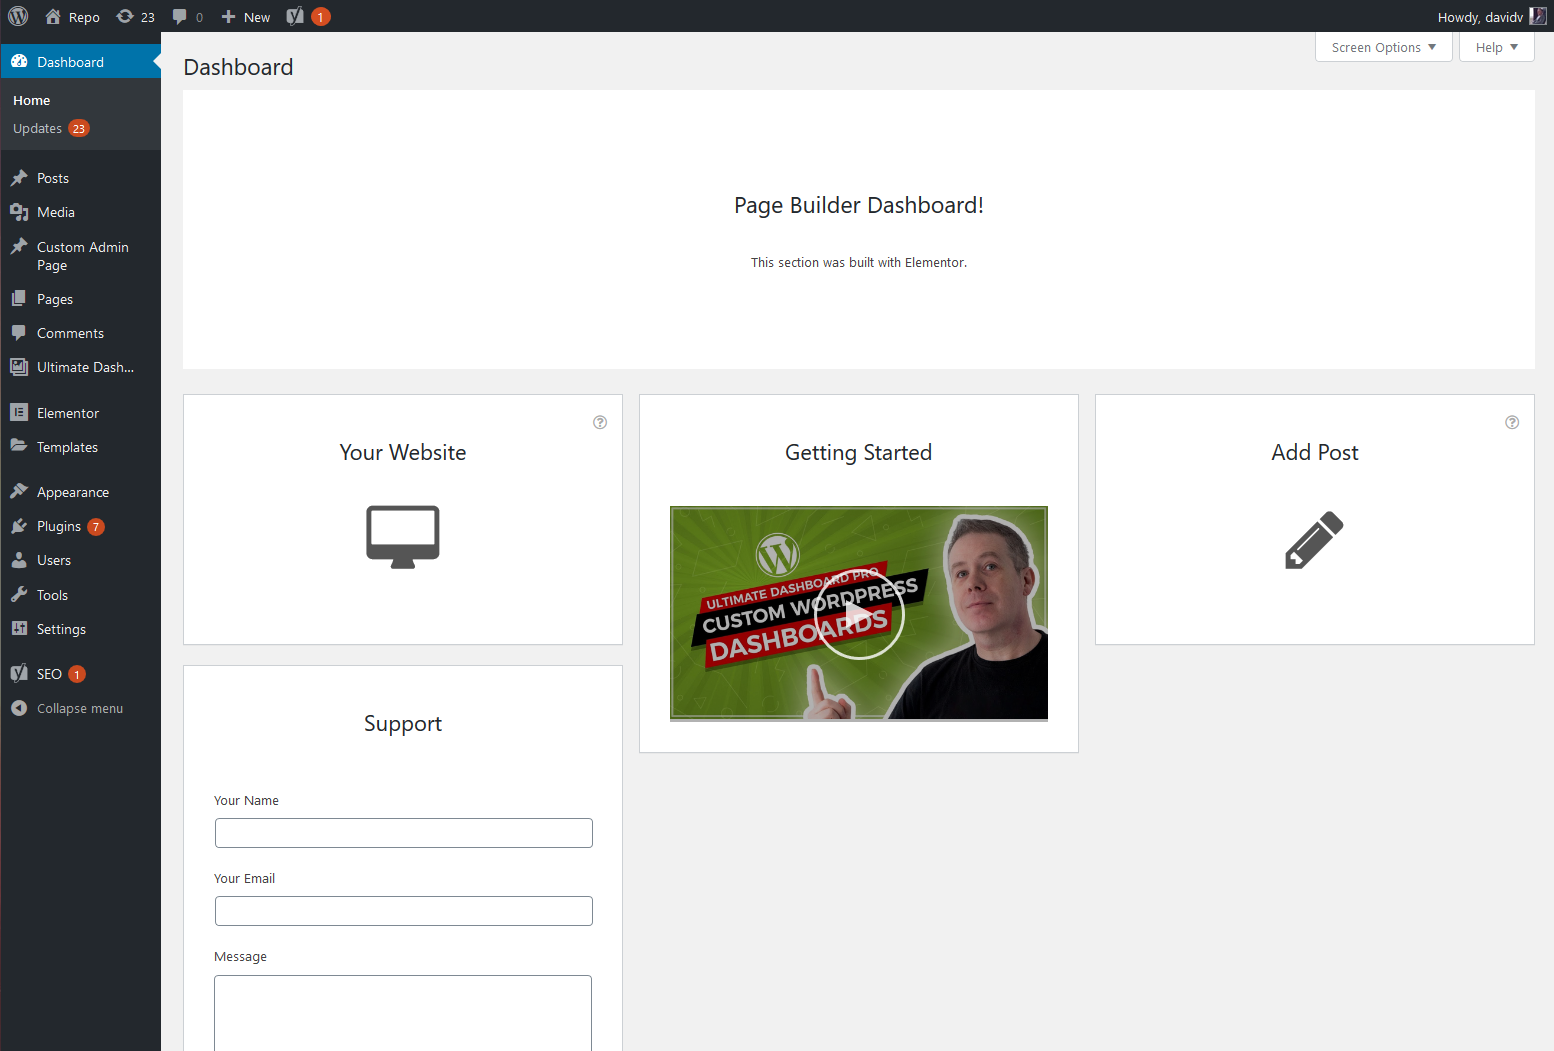
To take things one step further you can replace your entire dashboard with your saved page builder template or use your saved template along with your custom widgets like on the screenshot above.
Step 4: White Label WordPress
Under the Ultimate Dashboard menu tab, click on “White Label” to get to the White Label page. From here, you can customize your admin theme to fall more in line with your client’s specific branding.
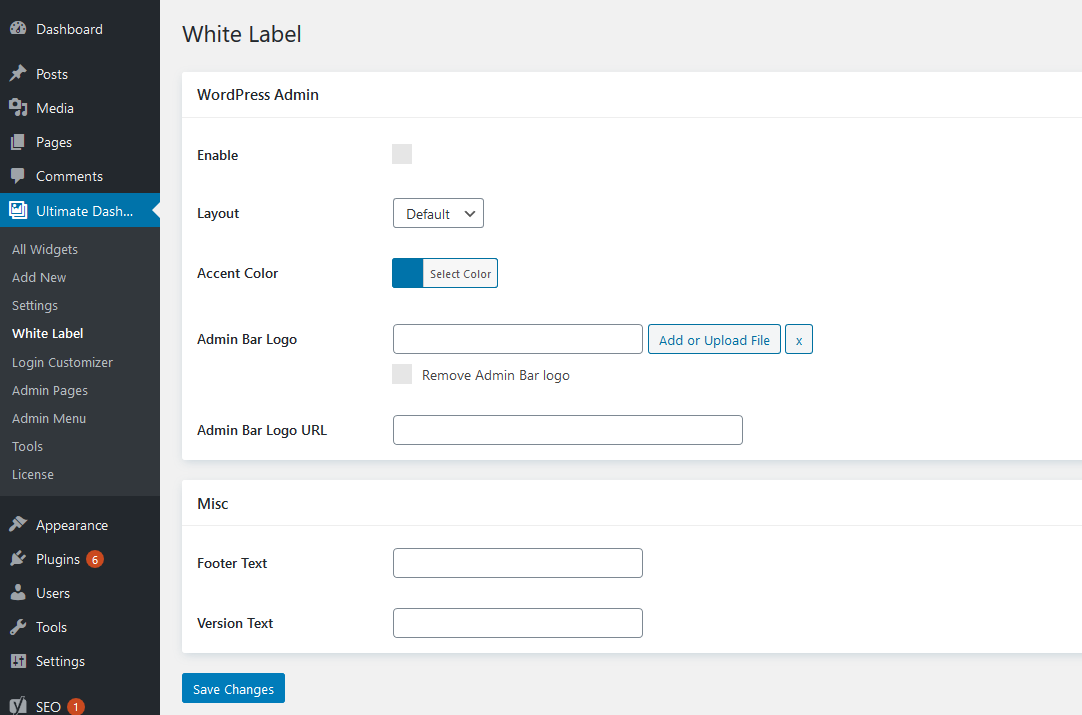
For starters, you’re able to change the accent color. WordPress has a default blue accent because that goes along with their branding. But if you want your client to feel more at home, pick something outside the box.
If their company logo is red, for instance, make the accent color red. You can even update the logo on the admin bar to be your client’s company logo. It’s also possible from this screen to create a custom footer & version text.
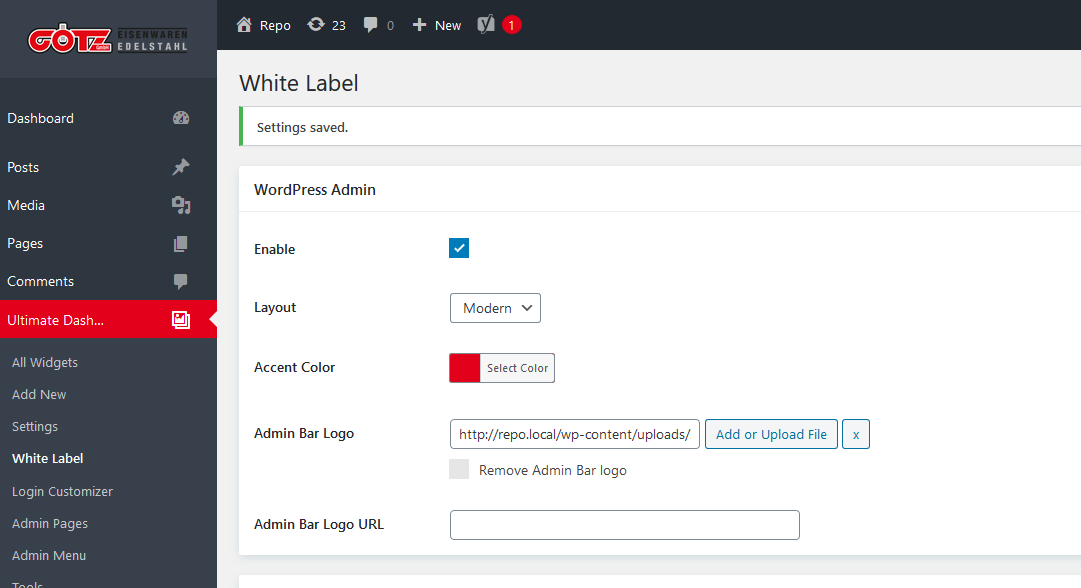
Once you’ve got everything where you want it, click on Save Changes on the bottom of the screen. Of course, if you’re not happy with the look or feel of the site once you see these changes deployed, you can easily change them back with nothing more than a few clicks.
Step 5: Create Custom Admin Pages
Finally, once all is said and done, you have the option to create custom admin pages.
This is actually something that can be done using both the free version of Ultimate Dashboard and Ultimate Dashboard Pro, but you’ll have to go about it in different ways.
When using the free version, you’ll select the “Admin Pages” option from the Ultimate Dashboard menu and click Add New in the top left corner.
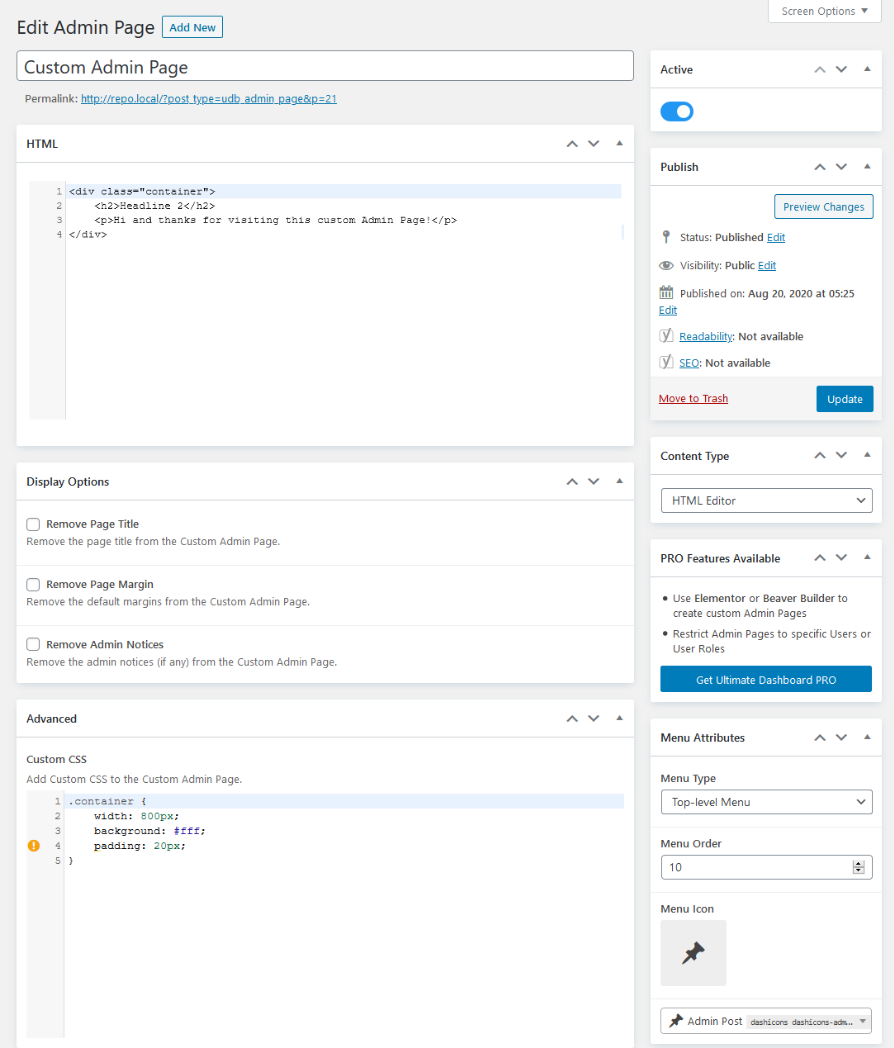
Once that’s done, you’ll be able to title your page and switch between the Default WordPress WYSIWYG and the HTML editor.
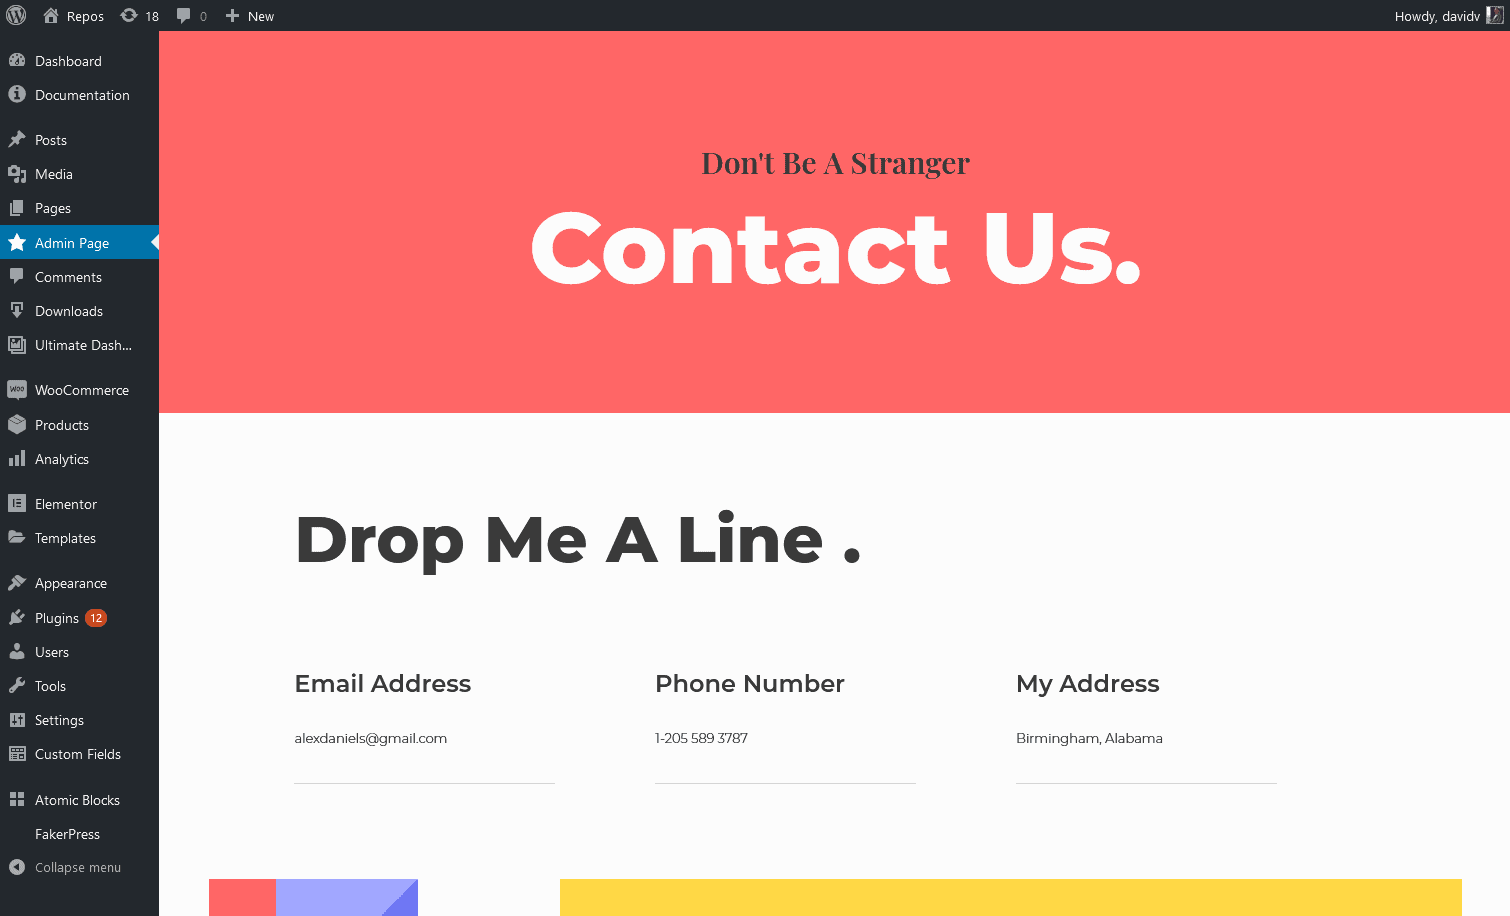
When using the PRO version, it’s a lot more simple. You can use a page builder like Beaver Builder or Elementor and build something like in the screenshot above.
Step 6: Tweak your Login Page
The PRO version allows for a bit more flexibility when customizing your WordPress login screen. Choose between different layouts & set a background image for your login page.
Step 7: Cusotmize the Admin Menu
Last but not least is the Admin Menu Editor feature in Ultimate Dashboard PRO. This allows you to hide, rename and rearrange top-level & sub-menu items in the WordPress dashboard navigation for each available user role individually.
Your customers won’t need access to things like the “Settings” menu in WordPress, do they? Declutter the WordPress admin menu with the Admin Menu Editor feature and show your clients only what they need to see.
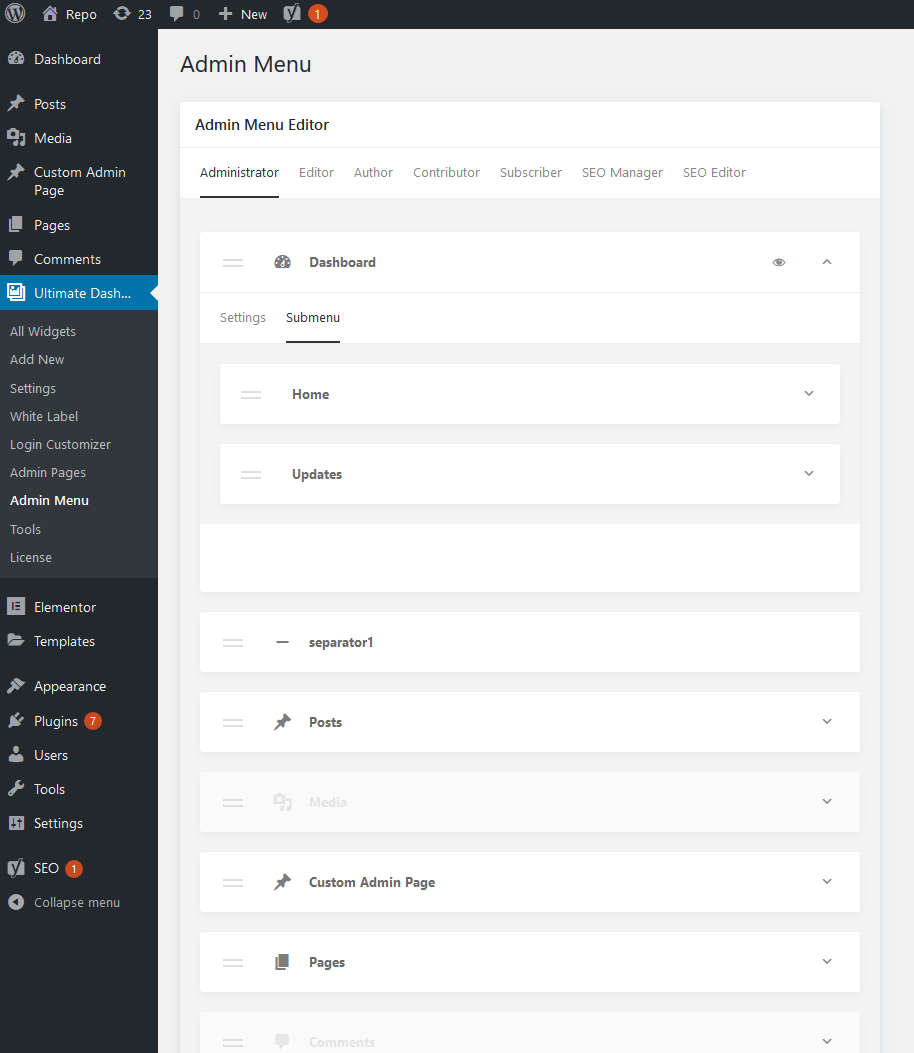
You can also change out the dashicons and even replace it with your custom SVG icon.
Bonus: Multisite Support
Ultimate Dashboard PRO works great, also on WordPress multisite networks.
The multisite support allows you to choose a blueprint which will make all subsites inherit the dashboard widgets, admin pages, branding settings, etc. that are declared on that particular site.
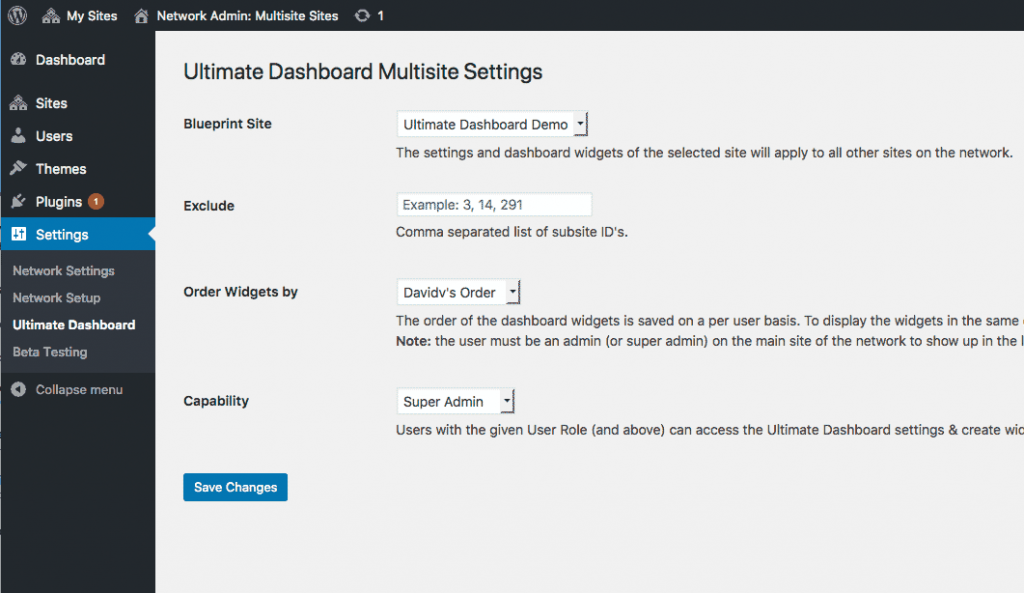
The multisite support is pretty powerful & complex and we’re not going into great detail about it in this post. You will find more details on how to use Ultimate Dashboard on your multisite, WaaS or SaaS network in the documentation.
In Conclusion
Customizing the WordPress dashboard can make your life a lot easier once you hand control of a website over to your client.
This process can be time consuming and difficult, or it can be a breeze. By using Ultimate Dashboard, you’re able to simplify the art of customizing your WordPress dashboard while saving time and keeping your prices competitive with other designers.
I would add that you can actually export & import settings/widgets to a different platform. This allows you to create some sort of a blueprint so you don’t need to repeat yourself each and every time when building a client site.
We’ve really only scratched the surface of what can be done with Ultimate Dashboard. There’s a lot more customization to be found within this plugin, including WordPress multisite support. For more information on Ultimate Dashboard, check it out on the official Ultimate Dashboard website.
Stay in the Loop!
Sign up for our Newsletter & be the first to get notified about new updates & features!


One Comment
Thank you so much……I learn many things for my beginning WordPress career……wpbeginer is so helpful for me